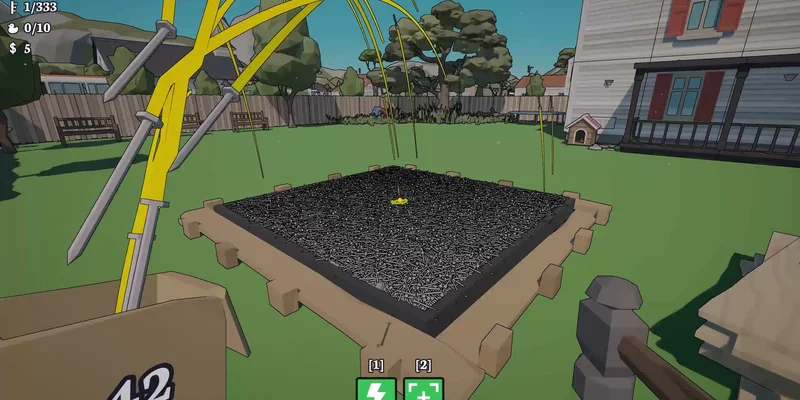
- Hammer these nails upgrade order starts with speed before expensive utility upgrades.
- Pickup amount and interaction range reduce backtracking while you repair larger areas.
- Storage upgrades help maintain longer work sessions without constant supply trips.
- Electric nails and radius become stronger choices after basic movement and collection tools improve.
- Vacuum upgrades are useful later, but they should not replace core speed and range improvements.
Hammer these nails upgrade order: Core Priority
The most reliable upgrade path begins with improvements that affect every repair cycle. Prioritize hammering speed first, then increase how much you can collect and how far you can interact with objects. This order keeps your character moving between tasks instead of waiting through slow actions or making repeated trips for supplies.
The available upgrade names and costs can vary during progression, so treat this as a priority guide rather than a rigid spending chart. The key principle is simple: improve the actions you repeat most often before purchasing specialized tools.
Video Highlights:
- Faster hammering makes repeated wall and floor repairs more efficient.
- Pickup amount reduces the number of supply collection trips.
- Interaction range helps reach awkward nails and objects around the house.
- Storage improvements support longer repair runs.
- Electric nails, radius, and vacuum tools are stronger after the basic loop feels comfortable.
| Priority | Upgrade focus | Why it matters | Recommended timing |
|---|---|---|---|
| 1 | Hammer speed | Improves the main repair action | First major investment |
| 2 | Pickup amount | Collects more nails or supplies per trip | Early progression |
| 3 | Interaction range | Reaches awkward objects and distant targets | Early to mid progression |
| 4 | Storage | Holds more resources before returning | Mid progression |
| 5 | Movement or jump | Opens access to roofs, upper walls, and hidden areas | Mid progression |
| 6 | Electric nails or radius | Adds specialized efficiency | After core upgrades |
| 7 | Vacuum | Helps collect remaining items and debris | Late utility purchase |
Choose the speed upgrade before chasing unusual tools. Faster hammering improves nearly every repair session, while specialized upgrades usually affect narrower situations.
Core Efficiency
- Hammer speed
- Pickup amount
- Storage capacity
Reach and Mobility
- Interaction range
- Jump access
- Upper-wall movement
Specialized Utility
- Electric nails
- Radius effects
- Vacuum collection
Early Upgrade Route for Faster Repairs
Early progression should focus on the upgrades that shorten the basic loop: collect nails, reach the target, hammer quickly, and return for more supplies only when necessary. The observed progression places speed at the center of this loop, with pickup and range upgrades supporting it.
Avoid spending all available currency on a single expensive utility option if your character still feels slow or frequently runs out of carrying space. A balanced early route usually produces more practical progress than rushing one advanced effect.
Buy Hammer Speed
Start with hammering speed whenever the upgrade is available and affordable. Faster repairs help clear walls, floors, and other construction targets without changing your route.
Increase Pickup Amount
Improve pickup amount next when supply collection becomes the main interruption. Carrying more nails at once reduces trips back to storage or dispensers.
Improve Interaction Range
Take interaction range when targets are difficult to reach or when you are losing time lining up with objects. This is especially useful around walls, furniture, and elevated areas.
Add Storage Capacity
Upgrade storage after your collection and interaction tools are functional. More storage is most valuable when a larger repair zone is already available.
| Early situation | Best response | Reason |
|---|---|---|
| Hammering feels slow | Speed | Improves every repeated repair action |
| Frequent supply trips | Pickup amount | Carries more materials per route |
| Targets are hard to reach | Interaction range | Reduces positioning and alignment problems |
| Inventory fills quickly | Storage | Extends each work session |
| Upper areas are inaccessible | Jump or mobility | Opens additional repair locations |
After each early purchase, test the entire loop: collect supplies, repair several targets, and return only when necessary. Keep the upgrade that saves time across the most actions.
Midgame Mobility, Range, and Exploration
Once basic speed and collection are improved, mobility becomes more important. Higher areas can contain additional nails, furniture, blueprints, ducks, or other exploration objectives. Jump access and interaction range help you reach targets that are easy to overlook from ground level.
Do not treat movement upgrades as purely optional. They can increase the number of available targets and make cleanup routes more practical. However, mobility should normally follow the first speed and collection improvements because it does not accelerate every repair by itself.
| Upgrade category | Main benefit | Common use |
|---|---|---|
| Jump | Reaches higher surfaces | Roofs, upper walls, raised platforms |
| Interaction range | Connects with distant targets | Walls, furniture, awkward corners |
| Pickup amount | Carries more collected items | Long routes through multiple rooms |
| Storage | Delays return trips | Large repair sections |
| Radius | Affects a broader nearby area | Clustered targets or special effects |
If progress appears incomplete, inspect upper walls, roofs, corners, and spaces behind furniture. A mobility upgrade may be more useful than another damage or effect upgrade when targets are difficult to locate.
Use a systematic route instead of moving randomly:
- Clear the current floor from one side to the other.
- Check nearby walls before changing rooms.
- Inspect elevated surfaces after unlocking jump access.
- Revisit storage and dispensers only after filling your carrying capacity.
- Mark unusual objects mentally so you do not search the same area repeatedly.
Midgame Exploration Checklist:
- Clear visible nails from the current floor
- Inspect upper walls and roof access points
- Check behind furniture and around room corners
- Use interaction range on difficult targets
- Return to storage only after maximizing the route
Electric Nails, Radius, and Specialized Tools
Specialized upgrades should come after the basic repair loop is efficient. Electric nails and radius effects can improve clustered work, but their value depends on how many nearby targets you can use them on. If your route still contains long collection trips or slow hammering, core upgrades generally provide a clearer benefit.
The most practical approach is to compare the upgrade with your current bottleneck. Choose electric effects when clustered targets are slowing you down. Choose radius when targets are close together but difficult to process individually. Choose cooldown improvements when the special ability is already being used often enough to justify more frequent activation.
| Specialized option | Choose it when | Delay it when |
|---|---|---|
| Electric nails | Groups of targets benefit from an added effect | Basic speed remains low |
| Radius | Nearby targets are difficult to cover individually | Targets are scattered across separate rooms |
| Cooldown | The special ability is used frequently | The ability is rarely activated |
| Strength | A stronger effect noticeably improves repairs | Range or collection is still limiting progress |
| Vacuum | Loose items and cleanup dominate the route | You still need core mobility upgrades |
Do not buy every specialized upgrade immediately. Identify whether your current problem is repair speed, supply access, target reach, or cleanup, then spend toward that problem.
Speed Build
Best for repeated wall and floor repairs. Prioritize hammer speed and cooldown support.
Collector Build
Best for long routes. Prioritize pickup amount, storage, and vacuum utility.
Reach Build
Best for hidden or elevated targets. Prioritize interaction range and jump access.
Effect Build
Best for clustered targets. Prioritize electric nails, radius, and strength.
A flexible build is usually safer than committing to one category too early. Keep enough currency available to respond to newly opened areas, especially if exploration reveals targets that require better reach or carrying capacity.
Late Cleanup and Efficient Spending
Late progression is less about unlocking the first major tool and more about removing the final sources of wasted time. At this stage, vacuum upgrades, cooldown reduction, stronger effects, and maximum utility stats can become worthwhile. The correct choice depends on what remains unfinished.
If only a few nails or hidden objects remain, range and vacuum tools may have more value than another general speed increase. If a large section still needs repairs, speed, storage, and pickup amount remain strong choices. Use your remaining currency according to the shape of the unfinished work rather than following the early route blindly.
| Remaining problem | Recommended focus | Practical outcome |
|---|---|---|
| Many repairs remain | Speed | Faster completion of repeated actions |
| Few hidden targets remain | Range and jump | Better access to overlooked areas |
| Loose items remain | Vacuum | Cleaner final collection route |
| Special ability feels slow | Cooldown | More frequent utility activation |
| Clustered targets remain | Electric nails and radius | Better area coverage |
| Currency is limited | Highest repeated-use upgrade | More value across the remaining route |
Review your unfinished objectives before every expensive purchase. A late vacuum upgrade can be excellent for cleanup, but it is less urgent while major repair sections remain.
A strong final route looks like this:
- Finish the largest visible repair zone.
- Refill supplies only when the route requires it.
- Search high areas and room edges.
- Use range or jump access for isolated targets.
- Save vacuum and specialized tools for the final cleanup pass.
- Check remaining currency before purchasing maximum-level abilities.
This approach prevents over-investing in an upgrade that does not address the targets currently blocking completion.
Q: What is the best Hammer these nails upgrade order for new players?
Start with hammer speed, then improve pickup amount, interaction range, and storage. Add jump or mobility once elevated targets become part of your route.
Q: Should I buy electric nails before speed?
Usually no. Electric nails and radius are more useful after the basic repair loop is fast and your collection route is manageable.
Q: When should I purchase vacuum upgrades?
Buy vacuum utility when loose items, debris, or final cleanup tasks are slowing progress. Delay it if large repair areas still need basic speed and storage improvements.
Q: Is interaction range better than pickup amount?
It depends on the bottleneck. Choose pickup amount when supply trips dominate your time; choose interaction range when targets are difficult to reach or align with.