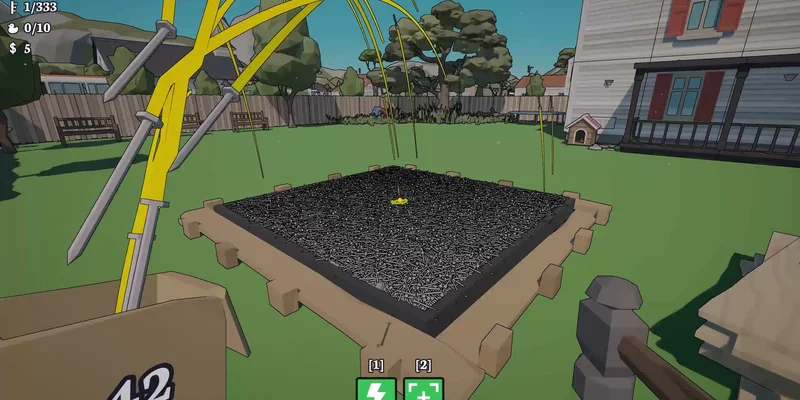
- Hammer these nails 10000 nails progression centers on upgrades, object selection, and efficient routes.
- Start with small objects such as lights, sticky notes, vents, benches, and signs for quick money.
- Prioritize handling speed because faster nail placement improves every later construction task.
- Use lightning and auto-placement when many nearby nail slots are visible at once.
- Reach 10,000 nails to unlock the major late-game door and finish the central progression goal.
Hammer these nails 10000 nails: Core Progression
Hammer these nails is a construction-focused simulation game built around collecting nails, placing them into highlighted objects, and earning money for completed work. The central objective is simple: keep improving your hammering speed until large structures become manageable.
The first nail can take several hits, so early progress feels deliberate. Once you purchase handling, range, and selection upgrades, clusters of nails begin moving into place much faster. The best strategy is not to attack the largest wall immediately. Instead, build momentum by completing nearby objects with low nail requirements.
Video Highlights:
- Small objects provide quick early payments.
- Upgrade choices strongly affect nail pickup and placement speed.
- Lightning becomes especially useful around dense groups of nail slots.
- The 10,000-nail milestone opens an important late-game area.
| Milestone | What to focus on | Practical goal |
|---|---|---|
| Early game | Nearby small objects | Build the first upgrade budget |
| First upgrades | Handling speed and selection radius | Reduce repetitive movement |
| Mid progression | Lightning and auto-placement | Clear dense groups efficiently |
| 5,000 nails | Upper-area access | Explore newly available spaces |
| 10,000 nails | Final major door | Complete the main nail target |
Small Objects
Lights, sticky notes, signs, vents, and benches are useful early targets because they can be completed quickly.
Large Walls
Walls contain many nail slots and are better after range, strength, and handling speed are upgraded.
Ability Clusters
Auto-placement and lightning are strongest when several nail positions sit close together.
Exploration
New doors, rooftops, ducks, and hidden areas reward players who revisit completed spaces.
Complete several cheap objects before committing to a fence or full wall. This gives you upgrade money without creating a long, low-reward hammering session.
Best Route for Fast Nail Progress
A reliable route starts with compact targets near the house and gradually expands outward. The goal is to minimize empty walking time while keeping your nail box supplied. When a nearby object is almost complete, finish it before crossing the map for a larger structure.
Lights and sticky notes are particularly attractive because they require comparatively few nails and can be completed while traveling between larger areas. Vents, benches, signs, and small frames also help create a steady stream of money.
| Priority | Target type | Why it works |
|---|---|---|
| 1 | Lights and sticky notes | Low commitment and quick completion |
| 2 | Vents and small frames | Compact nail groups with short travel time |
| 3 | Benches and signs | Several easy payments around the route |
| 4 | Windows and plants | Useful filler targets near the house |
| 5 | Fences and walls | High volume, best with strong upgrades |
| 6 | Roof sections | More efficient after jump and reach improvements |
Sweep the Immediate Area
Collect loose nails and complete the closest lights, sticky notes, vents, signs, and small frames. Avoid spending too long on a distant wall during the opening phase.
Finish Compact Construction
Move through benches, windows, plants, chairs, and other small objects near the main house. Complete objects fully so their payments can fund the next upgrade.
Upgrade Before Long Walls
Purchase handling speed, selection radius, or nail range before taking on large fences. These upgrades reduce the number of slow individual interactions.
Use Abilities on Dense Groups
Activate auto-placement and lightning when many nail slots are visible together. Let the abilities work while you continue collecting or positioning yourself.
Return for Missed Slots
Use improved vision or a second sweep to find red or unfinished sections. Small missed clusters can delay completion of an entire object.
| Route phase | Recommended movement | Avoid |
|---|---|---|
| Opening loop | Circle the house and nearby structures | Repeatedly crossing the whole map |
| Upgrade loop | Visit the bench after several payments | Buying cosmetic-feeling upgrades too early |
| Construction loop | Work one side of a structure at a time | Randomly switching between distant walls |
| Cleanup loop | Use vision to locate unfinished slots | Assuming a wall is finished from one angle |
Large structures may appear nearly complete while hidden or elevated nail slots remain. Check the back, roofline, bushes, and upper surfaces before abandoning the area.
Upgrade Priority and Ability Setup
Upgrade selection determines how quickly the game changes from manual hammering into a semi-automated construction loop. The most consistently useful improvements are handling speed, selection radius, hammer range, and nail pickup capacity.
Handling speed reduces the delay between collecting and placing nails. Selection radius makes it easier to gather multiple nearby nails. Hammer range allows one swing to affect more positions, while strength improves the effectiveness of certain powered abilities.
| Upgrade | Main benefit | Recommended timing |
|---|---|---|
| Nail handling speed | Faster pickup and placement flow | High priority throughout progression |
| Selection radius | Collects nearby nails more easily | Early and mid game |
| Hammer range | Reaches more nail slots per swing | Mid game, then upgrade again |
| Strength | Improves powered hammer effects | After basic speed improvements |
| Lightning | Chains hits across nearby nails | Buy when clusters become common |
| Auto-placement | Sends stored nails into adjacent slots | Strong after building a nail reserve |
| Pickup capacity | Holds more nails before returning | Helpful during long construction loops |
| Vision | Reveals unfinished or highlighted targets | Valuable during cleanup |
| Jump and reach | Opens elevated construction areas | Important before roof-focused work |
Speed Build
Focus on handling speed, selection radius, and pickup improvements. This is the safest general-purpose setup.
Power Build
Add strength and lightning after basic speed upgrades. This performs well against dense walls and roofs.
Automation Build
Invest in auto-placement and capacity so stored nails can be deployed while you move between targets.
The strongest upgrade pattern is usually a combination rather than a single stat. Speed makes ordinary hammering better, range increases the number of affected slots, and lightning provides a burst of progress when the nail positions are clustered.
Start with handling speed and selection radius, then add range. Purchase lightning once you regularly encounter groups of nearby nail slots, and save vision for cleanup-heavy sections.
How to Reach 10,000 Hammered Nails
The 10,000-nail objective is a long progression test rather than a single difficult challenge. You do not need to finish the biggest structure immediately. Instead, alternate between profitable small objects and large construction sections so your upgrades keep pace with the required nail volume.
The most important tactical change occurs when your hammer can affect several rows or nearby slots at once. At that point, fences and walls become much more attractive because each movement produces more progress. Lightning is especially effective when the target contains many prepared nail positions.
| Progress range | Best activity | Upgrade emphasis |
|---|---|---|
| 0–500 nails | Small objects and nearby fixtures | Handling speed, selection radius |
| 500–2,000 nails | Windows, benches, signs, and partial walls | Range, pickup capacity |
| 2,000–5,000 nails | Fences, walls, and dense house sections | Lightning, strength |
| 5,000–8,000 nails | Upper areas and roof access | Jump, reach, vision |
| 8,000–10,000 nails | Finish remaining walls and roof sections | Range, automation, cleanup |
Use the following routine whenever progress begins to slow:
- Collect enough nails to keep your box active.
- Load nearby objects before activating an ability.
- Stand where one hammer swing can reach several rows.
- Trigger lightning only when multiple targets are within its chain range.
- Inspect the lower edges and upper surfaces after each major section.
- Return to small unfinished objects when you need a quick payment.
The game also rewards exploration. Ducks and hidden spaces give you reasons to inspect areas that may look complete. By the late game, rooftop access and elevated sections become much more important because some targets cannot be reached efficiently from ground level.
At 5,000 nails, shift attention toward newly accessible upper areas. At 10,000, inspect the final door and nearby spaces rather than assuming every reward appears in the original construction area.
Completion Checklist and FAQ
Before attempting the final 10,000-nail push, make sure your build can support long construction loops. The checklist below is designed to prevent wasted travel and missed progress.
10,000-Nail Progress Checklist:
- Complete several low-cost objects near the starting house
- Purchase handling speed and selection radius upgrades
- Add hammer range before committing to large walls
- Use lightning and auto-placement on dense nail clusters
- Unlock elevated areas and inspect roof sections
- Find missed nail slots before leaving each major structure
- Reach 10,000 hammered nails and check the final door
| Completion task | Ready when... | Common mistake |
|---|---|---|
| Economy setup | Several small objects are paying consistently | Starting with the largest wall |
| Upgrade setup | Speed and range noticeably reduce manual work | Spending all money on one narrow stat |
| Ability setup | Lightning has multiple nearby targets | Activating it while standing away from the build |
| Exploration setup | Jump or reach access is available | Ignoring rooftops and upper surfaces |
| Final cleanup | Vision confirms remaining targets | Trusting a structure that looks finished |
Q: What is the fastest way to reach 10,000 nails in Hammer these nails?
Start with cheap nearby objects, invest in handling speed and selection radius, then move into fences and walls after your range and abilities improve. This keeps income and nail progress moving together.
Q: Which upgrades should I buy first?
Nail handling speed and selection radius are strong early choices because they improve collecting and placement. Add hammer range next, followed by lightning or auto-placement when dense construction becomes common.
Q: Why does a wall look finished when nails are still missing?
Some nail slots can sit behind bushes, along lower edges, on the back side, or above the main viewpoint. Use a second angle and vision-based cleanup before leaving.
Q: What unlocks after reaching 10,000 hammered nails?
The 10,000-nail milestone opens the major late-game door associated with the central progression goal. Continue exploring afterward because upper areas, ducks, and hidden spaces may still remain.
Do one slow inspection pass after the counter approaches 10,000. A single missed nail or hidden object can make a completed area appear less finished than it really is.