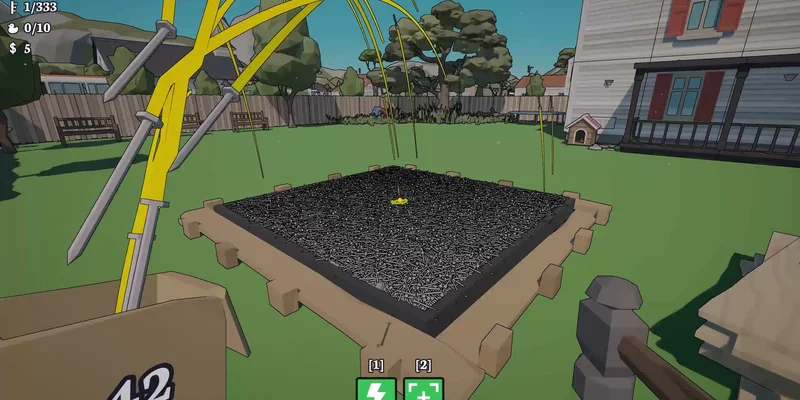
- Hammer these nails all upgrades: Prioritize upgrades that improve nail targeting and hammer efficiency.
- First priority: Increase selection radius to collect and place nails more comfortably.
- Second priority: Improve hammer damage when one action can affect multiple nails.
- Progression tip: Repair profitable objects before spending heavily on optional improvements.
- Resource rule: Collect small batches first, then carry larger amounts after your workflow improves.
Hammer these nails all upgrades: What to Prioritize
Hammer these nails all upgrades are built around a simple repair loop: collect loose nails, place them into the correct slots, earn money from completed repairs, and reinvest that money into better hammer performance. The most useful improvements are the ones that reduce wasted movement or make each hammer action cover more work.
The available gameplay information identifies several upgrade concepts, including selection radius, hammer damage, and range. A more efficient approach is to improve control and reach before chasing expensive goals. This keeps the early repair cycle manageable and helps you finish benches, house sections, and other repair targets with fewer interruptions.
Video Highlights:
- Collecting loose nails is the first step before repairing an object.
- Correct nail placement is required to complete repair targets.
- Hammer actions can affect multiple nails at once.
- Selection radius, hammer damage, and range are key upgrade themes.
- Completed repairs provide money for further progression.
| Upgrade focus | Main benefit | Recommended priority | Why it matters |
|---|---|---|---|
| Selection radius | Easier pickup and targeting | High | Reduces missed clicks around nail piles and repair slots |
| Hammer damage | More effective hammer actions | High | Helps one action handle more nail work |
| Range | Better reach across the work area | Medium to high | Reduces movement between nearby targets |
| Speed-related improvements | Potentially faster actions | Situational | Prioritize only when the upgrade is clearly available |
| Large progression goals | Access to new areas or objectives | Later | Expensive goals can wait until the repair loop is stable |
Start with selection radius when available. Better targeting improves both nail collection and placement, making every later upgrade easier to use.
Targeting Upgrades
- Selection radius
- Easier nail pickup
- Fewer missed placements
- Best for early consistency
Impact Upgrades
- Hammer damage
- More value per action
- Useful when several nails are grouped together
- Strong mid-progression choice
Mobility Upgrades
- Range
- Less walking between targets
- Better access to spread-out repair points
- Strong after targeting feels reliable
Upgrade Order for Faster Repairs
Upgrade order matters because the game rewards a clean repair rhythm rather than random spending. Before buying anything, gather enough nails to understand the target’s actual requirement. Small repairs can reveal whether you need more carrying capacity, better selection, or stronger hammer actions.
The most reliable sequence is selection radius first, hammer damage second, and range third. This order is not a claim that every save file uses the same shop layout; it is a practical priority based on how the named mechanics affect the repair loop.
| Stage | Upgrade decision | Repair behavior | Spending rule |
|---|---|---|---|
| Early | Selection radius | Gather and place nails with fewer targeting errors | Buy when available at a reasonable early cost |
| Developing | Hammer damage | Finish grouped nail sections more efficiently | Choose it before cosmetic or uncertain upgrades |
| Mid progression | Range | Reach distant nails and slots more comfortably | Buy after basic targeting is reliable |
| Expansion | Area access | Move toward backyard or attic objectives | Fund access after profitable repairs |
| Late goals | Expensive objectives | Pursue major milestones and special targets | Avoid draining all repair money at once |
Inspect the Upgrade Area
Check the available upgrade descriptions before spending. Look for terms such as selection radius, hammer damage, range, or speed, then compare the benefit with your current bottleneck.
Fix the Targeting Problem First
If nails are difficult to pick up or place, select the targeting improvement. A larger selection radius can save time across every repair instead of helping only one object.
Improve Hammer Efficiency
Once collection and placement feel consistent, invest in hammer damage. This is especially useful when several nails can be affected by one action.
Add Reach for Spread-Out Work
Purchase range after your basic workflow is stable. More reach is most valuable when repair points are separated or when walking interrupts your repair rhythm.
Save for Area Progression
Keep a reserve after the core upgrades. Use completed repairs to fund larger objectives instead of spending every dollar immediately.
Large objectives can require substantial resources. If an upgrade or progression target appears unusually expensive, continue completing practical repairs first and keep enough money for the next useful improvement.
Nail Collection and Placement Strategy
Nail management is the foundation of every upgrade path. The repair loop becomes much smoother when you collect a controlled amount, identify the required quantity, and return for more only when necessary. Carrying a large pile can be useful, but over-collecting before you understand the target may create unnecessary movement and confusion.
Some repair targets show more than one nail position, and a finished object may reward money after the final slot is filled. Use the target’s visible requirement as your guide. If the object is not complete, do not assume the upgrade failed; check for a missed slot or return to the nail pile.
| Repair situation | Recommended action | Common mistake | Better approach |
|---|---|---|---|
| Small target | Collect a modest batch | Carrying far more than needed | Confirm the target requirement first |
| Several nearby slots | Place nails in a deliberate pattern | Clicking rapidly without checking | Move across visible slots systematically |
| Grouped nails | Use stronger hammer actions when available | Treating every nail as a separate action | Test whether one action affects multiple nails |
| Missing completion | Inspect the target again | Leaving after the first visible section | Search for remaining slots or required nails |
| Distant target | Improve reach or route efficiently | Repeatedly crossing the same area | Gather nearby resources before returning |
The best routine is to collect, place, inspect, and then decide whether to buy. That sequence prevents a common progression mistake: spending money on a new upgrade before confirming that the current repair target was simply incomplete.
Essential Repair Checklist:
- Inspect the target before collecting nails
- Gather a controlled batch of loose nails
- Place nails into every visible slot
- Check for missing requirements before leaving
- Spend repair money only after confirming the next priority
A consistent collect-place-inspect cycle is more valuable than rushing. It keeps your money moving toward upgrades while reducing wasted trips across the yard, house, or other repair areas.
Collect
Pick up loose nails near the current work area. Begin with a manageable batch.
Place
Insert nails into the correct slots and watch for changes in the target.
Inspect
Confirm whether every required nail has been placed before moving away.
Reinvest
Use the reward to improve targeting, hammer strength, or range.
Money Management and Progression Routes
Money is earned by completing repairs, so the strongest progression route is to prioritize work that can be finished with your current tools. A small completed object may provide an early reward, while larger objectives can require more preparation. Use inexpensive repairs to build momentum before targeting costly milestones.
The repair economy should be treated as a loop rather than a single purchase decision:
- Gather nails.
- Complete a repair.
- Collect the reward.
- Buy the most useful available upgrade.
- Return to a more efficient repair target.
| Money decision | Good use | Risk | Recommended response |
|---|---|---|---|
| Early earnings | Selection radius or basic efficiency | Spending before understanding the upgrade | Read the description and compare the impact |
| Medium earnings | Hammer damage or range | Buying too many small improvements | Choose the upgrade that fixes your largest delay |
| Area savings | Access to new work zones | Losing all funds before the next repair | Keep a reserve for routine repairs |
| Large milestone | Special objective or expensive progression | Delaying practical upgrades too long | Buy core efficiency first, then save deliberately |
| Extra cash | Flexible progression | Assuming every upgrade is equally valuable | Match spending to your current repair bottleneck |
When deciding between range and hammer damage, ask where your time is going. If you spend most of the run walking between locations, range is attractive. If you are already near the target but need many actions to finish it, hammer damage is the better choice.
Do not follow a fixed purchase order blindly. Select the upgrade that removes your biggest delay: targeting errors, repeated hammer actions, or unnecessary movement.
| Bottleneck | Upgrade direction | Expected improvement |
|---|---|---|
| Nails are hard to select | Selection radius | Cleaner collection and placement |
| Multiple nails need repeated hits | Hammer damage | More efficient grouped repairs |
| Targets are spread out | Range | Less travel between action points |
| Repairs remain unfinished | Inspection and routing | Fewer missed slots and repeat trips |
| Progression feels expensive | Profitable repair loop | More reliable savings before major goals |
A practical reserve is especially important before pursuing objectives connected with the main backyard or attic areas. Those locations are presented as meaningful progression destinations, but the exact cost or requirement may depend on the current version. Treat them as goals to prepare for rather than purchases to force immediately.
Upgrade Planning, Mistakes, and FAQ
The strongest all-upgrades plan balances three concerns: control, action efficiency, and access. Selection radius improves control, hammer damage improves the value of each hit, and range improves access to work. A good build does not necessarily maximize one category; it reduces the delay that appears most often in your current repair route.
Avoid these common mistakes:
- Buying an expensive upgrade before completing available repairs.
- Collecting a huge nail batch without checking the target requirement.
- Leaving an object after filling only the easiest visible slots.
- Ignoring range when work areas become spread out.
- Assuming a higher price always means a better immediate purchase.
- Repeating a route without checking whether a nearby repair is available.
| Mistake | Why it slows progression | Correction |
|---|---|---|
| Random upgrade spending | The repair loop remains inefficient | Identify the largest current bottleneck |
| Over-collecting nails | Inventory and movement become harder to manage | Start with a controlled batch |
| Skipping final inspection | Completed rewards are delayed | Check every slot before leaving |
| Ignoring range | Travel consumes more time | Add reach once targeting is stable |
| Spending all money | The next useful purchase becomes harder | Keep a reserve for core progression |
For most early runs, use selection radius as the foundation, hammer damage as the main efficiency upgrade, and range as the mobility upgrade. Adjust the order when your current bottleneck clearly differs.
Q: What is the best first upgrade in Hammer these nails?
Selection radius is the strongest general first choice when it is available because it improves nail pickup and placement. It supports every later repair instead of helping only one target.
Q: Should I buy hammer damage or range first?
Choose hammer damage when repeated actions are slowing down grouped repairs. Choose range when walking between nails, slots, and work areas is the larger problem.
Q: How should I collect nails efficiently?
Start with a controlled batch, place nails into the visible slots, inspect the target, and collect more only when the requirement is not yet satisfied.
Q: How do I progress toward larger areas and expensive goals?
Complete practical repairs, reinvest in core efficiency, and keep a money reserve. Larger destinations such as the backyard or attic should be approached after your repair loop is stable.
Upgrade names, prices, and area requirements can change with updates. Use the in-game description as the final authority before committing your money.
The core lesson is simple: improve the actions you repeat most. Better selection makes nail handling cleaner, better hammer damage makes repairs faster, and better range reduces travel. Combine those upgrades with careful inspection and controlled spending to build a reliable route through every available repair objective.