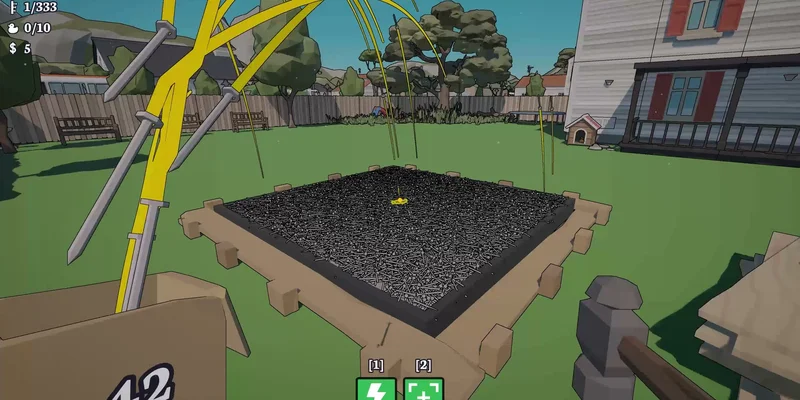
- Hammer these nails finish 10000 nails requires steady routing, upgrades, and careful searches.
- Start with speed so repeated hammering and pickup trips take less time.
- Expand interaction range to collect nearby nails and objects more efficiently.
- Search vertically because roofs, upper walls, stairs, and hidden areas can hold missing nails.
- Check the final count before leaving an area, especially at 9,999 nails.
Hammer these nails Finish 10000 Nails: What to Prepare
The fastest way to finish 10,000 nails is to treat the house as a route rather than a collection of isolated targets. Clear one section at a time, keep your nail supply moving, and use upgrades that reduce repeated travel. The final stretch is usually more demanding than the opening because a single nail may be hidden behind furniture, above a wall, on a roof, or inside a less obvious room.
The available gameplay evidence points to a progression loop built around hammering, collecting nails, earning money, and improving stats. Useful upgrades include hammer speed, pickup amount, interaction range, movement-related improvements, electric nails, lightning, a dispenser, and vacuum-related tools. Not every upgrade has the same value during every stage, so prioritize the improvements that remove your current bottleneck.
Video Highlights:
- Reaches the late-game count and tracks progress toward 10,000 nails.
- Uses speed, pickup, range, vacuum, and electric upgrades during cleanup.
- Searches upper walls, roofs, rooms, furniture areas, and exterior sections.
- Demonstrates the importance of locating the last missing nail.
Core preparation priorities
| Priority | Focus | Why it matters |
|---|---|---|
| 1 | Hammer speed | Reduces the time required for every repeated nail interaction. |
| 2 | Pickup amount | Lets you carry more nails before returning for supplies. |
| 3 | Interaction range | Helps collect nearby nails and interact with awkward placements. |
| 4 | Movement access | Jumping and vertical access reveal upper routes and roof areas. |
| 5 | Vacuum tools | Useful for cleanup when loose items or nails are difficult to collect manually. |
A good early setup does not require buying every available improvement. If hammering feels slow, choose speed first. If you spend too much time returning for supplies, improve pickup capacity. If the remaining targets are near walls, furniture, or elevated platforms, interaction range becomes more valuable.
Do not spend every dollar immediately. Keep enough money available for the upgrade that directly solves your current delay: speed for hammering, pickup for supply runs, or range for awkward targets.
Speed Build
- Faster hammer interactions
- Best for repeated wall sections
- Strong during long cleanup sessions
Supply Build
- Higher pickup capacity
- Fewer trips for more nails
- Useful when storage is distant
Search Build
- Better interaction range
- Easier collection near objects
- Helps with awkward placements
Utility Build
- Vacuum and electric options
- Supports late cleanup
- Useful when manual collection slows down
Build a Reliable 10,000-Nail Route
A route prevents repeated searching and makes the final count easier to verify. Begin at a consistent landmark, then work through connected areas in one direction. A practical route can move from the lower exterior to the main floor, upstairs rooms, upper walls, roof sections, and finally hidden or obstructed spaces.
The exact layout may vary as the game develops, but the principle remains stable: divide the property into zones and record which zones are finished. Avoid jumping randomly between the front, interior, roof, and side walls. Random movement makes it difficult to identify whether a missing nail is genuinely hidden or simply overlooked.
Recommended zone order
| Route stage | Area to inspect | Search method |
|---|---|---|
| 1 | Front and lower exterior | Follow walls, fences, corners, and visible structures. |
| 2 | Main floor | Check walls, floors, furniture, storage, and room edges. |
| 3 | Side and rear walls | Sweep horizontally before moving to another level. |
| 4 | Upper floor and stairs | Inspect landings, corners, and wall sections above eye level. |
| 5 | Roof and elevated spaces | Use jumping or unlocked movement access to reach high targets. |
| 6 | Hidden interiors | Recheck rooms, blocked spaces, and areas behind objects. |
Use a simple status system for each zone:
- Open: Targets remain and the zone needs another sweep.
- Clear: The visible and reachable nails have been handled.
- Verify: The zone is clear, but the global counter still suggests one or more nails remain.
This approach is especially important near the end. When the counter shows 9,999, do not assume the final nail is in the most recently visited room. Return to the route and inspect every zone marked “Verify.” A missing target can be close to the floor, above a wall, behind a structure, or inside a space that initially looked decorative.
Area verification table
| Zone | First pass | Second pass | Final check |
|---|---|---|---|
| Exterior | Walls and fences | Corners and upper edges | Roofline and hidden sides |
| Main rooms | Visible walls and floor | Furniture and storage | Doorways and blocked gaps |
| Upper areas | Stairs and platforms | High wall sections | Roof access and ledges |
| Utility spaces | Dispensers and containers | Nearby floor edges | Behind or beside objects |
A completed-looking room is not necessarily a cleared room. Always inspect vertical surfaces, object edges, and spaces above the normal camera line before marking a zone finished.
Step-by-Step Route to Finish the Count
Follow the process below whenever you want a repeatable method for reaching the 10,000-nail milestone. The objective is to reduce wasted movement while preserving enough flexibility to investigate unusual placements.
Fill Your Supply
Collect enough nails for a full working loop before starting a section. A larger pickup capacity reduces interruptions, but do not delay progress indefinitely while waiting for the perfect upgrade.
Clear One Zone
Choose one connected area and hammer every visible target before moving on. Work from left to right or clockwise so your sweep has a consistent direction.
Check Height and Obstructions
Look above walls, around furniture, behind structures, and along stairways. Use jumping or other movement access when a section appears empty but the count does not match your expectations.
Upgrade the Current Bottleneck
Spend earned money on the improvement that saves the most time. Hammer speed is usually helpful for long sessions, while range, pickup, and vacuum tools become more valuable during cleanup.
Revisit Verified Zones
At 9,000 nails and beyond, return to areas marked for verification. Compare the global counter after each sweep until the remaining target is isolated.
Upgrade decisions by situation
| Current problem | Best direction | Practical result |
|---|---|---|
| Hammering takes too long | Hammer speed | Faster progress across large walls |
| Supply trips interrupt progress | Pickup amount | More nails carried per route |
| Targets are close but hard to reach | Interaction range | Easier collection around objects |
| Loose targets are difficult to collect | Vacuum-related upgrade | Better late-stage cleanup potential |
| Large groups need extra efficiency | Electric nails or lightning | Adds utility when available |
| You cannot reach upper areas | Movement or jump access | Opens roof and elevated searches |
The order is flexible. A player already carrying large quantities may gain more from speed, while a player exploring a dense room may benefit from range. Avoid upgrading a feature simply because it is available. Match each purchase to the obstacle slowing your current route.
After each major upgrade, complete one full zone before changing your build again. This makes the time saved easier to notice and prevents scattered spending.
Find the Last Missing Nail
The final nail is often a search problem rather than a speed problem. Once the count reaches 9,999, stop buying unnecessary upgrades and switch into verification mode. The goal is to inspect locations that are easy to skip during ordinary movement.
Common trouble spots include upper walls, roof edges, spaces behind furniture, corners near doors, fence lines, rooms that were entered only briefly, and locations that require jumping. The search should be systematic. Start from a fixed landmark and retrace the route in reverse order, checking each surface from a different camera angle.
Final-nail search order
| Search order | Location type | What to inspect |
|---|---|---|
| 1 | Recent work area | Confirm no nail was skipped during a fast sweep. |
| 2 | Upper walls | Look above normal eye level and near wall tops. |
| 3 | Roof and ledges | Check elevated surfaces and jump-access areas. |
| 4 | Furniture zones | Inspect behind tables, benches, storage, and decorative objects. |
| 5 | Doors and corners | Search narrow spaces, edges, and room transitions. |
| 6 | Exterior perimeter | Recheck fences, side walls, and the opposite side of structures. |
Use the counter as a diagnostic tool. If a full zone sweep does not change the number, move to another zone instead of repeating the same action immediately. If the count changes, continue in that area and slow down around the remaining targets.
Final 10,000-Nail Checklist:
- Check every lower wall and floor section
- Inspect upper walls, stairs, and roof access
- Search behind furniture, containers, and room objects
- Revisit fences, corners, doors, and exterior sides
- Confirm the counter reaches 10,000 before stopping
Why the counter matters
The counter provides the clearest progress signal, but it should be paired with zone notes. A high total confirms that the overall route is working; it does not identify the missing location. Keep the count, route, and camera angle in mind together.
When one nail remains, change either your route direction or your camera height. Repeating the same sweep from the same angle is less useful than approaching the area from a new perspective.
Milestones, Mistakes, and FAQ
Reaching 10,000 nails is a completion milestone that rewards patience more than reckless speed. The most common mistake is rushing the last section because the counter looks nearly finished. A slower inspection usually saves time compared with repeatedly searching the same obvious locations.
Milestone guide
| Nail count | Main objective | Recommended action |
|---|---|---|
| 1,000 | Establish your route | Learn the property and identify supply points. |
| 3,000 | Improve efficiency | Add speed or pickup capacity based on your bottleneck. |
| 5,000 | Expand access | Search additional rooms, upper areas, and new movement paths. |
| 9,000 | Begin cleanup | Revisit zones and inspect hidden or elevated targets. |
| 9,999 | Isolate the final target | Stop broad upgrades and perform a structured search. |
| 10,000 | Confirm completion | Verify the counter and finish the session cleanly. |
Mistakes to avoid
- Spending all money on advanced utility before improving the slowest part of the route.
- Marking an area clear without checking its upper walls and object edges.
- Assuming a missing nail must be inside the last room visited.
- Ignoring roof access, jump paths, or elevated platforms.
- Searching without a consistent route or zone status system.
Keep your final search calm and deliberate. The last target is easier to find when you stop treating the property as one large space and return to it as a list of small, verifiable zones.
Q: What is the best upgrade for a Hammer these nails finish 10000 nails run?
Hammer speed is a strong general choice because it improves every repeated interaction. However, pickup amount, interaction range, vacuum tools, and movement access may be better when supply trips, awkward targets, or vertical areas are slowing you down.
Q: Where should I look when the counter shows 9,999 nails?
Check upper walls, roofs, ledges, furniture edges, doors, corners, fences, and rooms that were only briefly visited. Retrace your route from a different camera height instead of repeating the same sweep.
Q: Do I need every upgrade to reach 10,000 nails?
No specific upgrade requirement is established here. Use upgrades to remove the bottleneck affecting your route. Speed, pickup capacity, range, and movement access each support different parts of the cleanup process.
Q: What is the safest way to confirm the milestone?
Use the global counter as your final confirmation, then verify that the last target has been hammered and that the surrounding zone no longer contains visible or reachable nails.