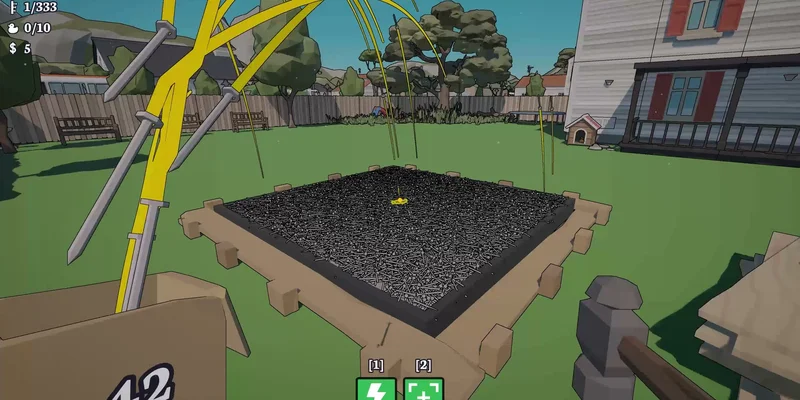
- Hammer these nails fastest completion depends on speed, pickup range, and a systematic search route.
- Upgrade speed first so every wall, floor, roof, and interior section takes less time.
- Increase pickup capacity before long cleanup routes to reduce repeated trips to the dispenser.
- Use jump access to check roofs, upper walls, and awkward locations that are easy to miss.
- Finish with a slow sweep because the final nail is often hidden behind furniture, inside a wall, or below the floor.
Hammer these nails Fastest Completion Route
The fastest completion strategy is built around reducing downtime rather than simply swinging the hammer faster. Start by improving movement and hammer speed, collect a large supply of nails, and then clear the property in connected sections. This method prevents unnecessary backtracking between the dispenser, storage areas, and unfinished walls.
The most reliable route begins on the lower exterior, continues through the main rooms, then moves upstairs and onto the roof. Finish by checking furniture, narrow corners, wall interiors, and locations that require jumping. The objective is to keep your character working continuously while preserving a small reserve of nails for the final cleanup.
Video Highlights:
- Speed upgrades noticeably improve the pace of repeated hammer interactions.
- Pickup amount and interaction range reduce trips across the property.
- Jump access helps reveal nails on roofs, upper walls, and elevated sections.
- The final missing nail may require a deliberate interior or hidden-location sweep.
| Route Stage | Main Area | Recommended Action | Completion Check |
|---|---|---|---|
| 1 | Lower exterior | Clear visible walls, fences, and nearby floor sections | No obvious nails remain at ground level |
| 2 | Main interior | Work room by room and inspect furniture edges | Storage and furniture areas are checked |
| 3 | Upper level | Use stairs and jump access to reach high sections | Upper walls and elevated platforms are clear |
| 4 | Roof and exterior return | Sweep roof edges, outside walls, and awkward corners | No isolated nail remains outside |
| 5 | Final cleanup | Use range, vacuum, and careful visual checks | Counter reaches the final completion target |
Carry enough nails to complete a full section before returning to storage. Short, repeated supply trips are one of the biggest sources of lost time.
The route should remain flexible when the environment reveals a hidden section. If a wall is nearly complete and only a few nails remain, finish it immediately unless doing so would require a long detour. A completed area gives you a clear visual boundary and makes later searches easier.
Track progress by section rather than relying only on the overall counter. A nearly finished property can still contain several missing nails in separate locations. Treat every room, wall, roof edge, and furniture cluster as its own mini-objective.
Best Upgrade Order for Faster Hammering
Upgrade selection has the greatest effect during long completion attempts. The strongest general priority is hammer speed, followed by pickup capacity and interaction range. These upgrades improve the number of actions completed per minute and reduce the time spent walking between objects and resources.
The available upgrade choices can vary during progression, so use the following order as a practical decision rule rather than a rigid build. When speed is offered, it normally provides the clearest immediate benefit. When speed is unavailable, choose the upgrade that removes the most repeated movement from your current route.
Speed First
- Highest priority for repeated hammering
- Makes walls and floors faster to complete
- Becomes more valuable as nail counts increase
Pickup Capacity
- Carry more nails between supply trips
- Supports longer uninterrupted routes
- Particularly useful during large exterior sections
Interaction Range
- Reaches awkward nails with less repositioning
- Helps around furniture, corners, and narrow spaces
- Strong choice when movement is causing delays
Electric and Utility Options
- Can improve area coverage or special interactions
- Consider after core efficiency upgrades
- Test the effect before committing further resources
| Upgrade Priority | Upgrade Type | Why It Helps | Best Use |
|---|---|---|---|
| 1 | Hammer speed | Reduces time per nail interaction | Large walls, floors, and repeated sections |
| 2 | Pickup amount | Lowers the number of supply returns | Long exterior and multi-room routes |
| 3 | Interaction range | Reduces repositioning around objects | Furniture, corners, and narrow spaces |
| 4 | Movement or jump utility | Improves access to elevated areas | Roofs, upper walls, and hidden platforms |
| 5 | Electric or dispenser upgrades | Adds situational efficiency | Later progression after core stats improve |
When several useful upgrades appear together, compare the number of future actions each one affects. A speed upgrade benefits nearly every nail. A range upgrade may be more valuable when the remaining nails are concentrated in difficult locations. A dispenser or vacuum improvement can be worthwhile when supply management becomes the main bottleneck.
Avoid spending all resources on a situational effect before the basic workflow is efficient. The fastest runs usually come from stacking small time savings: fewer trips, fewer missed interactions, faster swings, and easier access to elevated areas.
Choose upgrades that improve your next several minutes of work, not only the most interesting effect on the menu. Consistent efficiency beats a specialized bonus when many nails remain.
The upgrade system also rewards reassessment. After a major speed increase, movement and pickup capacity may become the next limiting factors. After unlocking jump access, inspect roof routes again because previously unreachable areas can now become part of the main completion path.
Step-by-Step Completion Method
Use this four-stage process whenever you want a repeatable fastest-completion attempt. The key is to separate preparation, bulk hammering, elevated access, and final verification. Each stage has a different purpose, so avoid mixing supply management with detailed searching unless necessary.
Prepare Your Supply
Visit the dispenser or storage area before beginning a major sweep. Increase pickup amount when possible, collect enough nails for the next connected area, and confirm that your current upgrade setup supports uninterrupted work.
Clear Connected Sections
Start with the lower exterior or the nearest unfinished section. Complete walls, floors, and nearby objects together instead of jumping randomly between distant locations. This preserves momentum and makes the remaining areas easier to identify.
Unlock and Check Elevated Access
Use stairs and jump access to inspect upper walls, roofs, platforms, and unusual openings. Look above doors, along roof edges, and around places that cannot be viewed comfortably from ground level.
Perform a Deliberate Final Sweep
When the counter is close to completion, stop rushing. Recheck furniture, interior walls, hidden corners, lower sections, and any area where the camera or geometry obscures a nail. Use interaction range or vacuum-style utility if available.
| Step | Focus | Common Delay | Faster Response |
|---|---|---|---|
| Preparation | Nails and upgrades | Returning to storage too often | Increase pickup amount and plan a full section |
| Bulk work | Connected construction areas | Switching between distant targets | Finish one room, wall, or exterior zone at a time |
| Elevated access | Roofs and upper walls | Ignoring newly reachable locations | Check high areas immediately after gaining jump access |
| Final sweep | Missing nails | Searching randomly | Follow a fixed interior-to-exterior route |
A useful technique is to divide the property into visual blocks. For example, treat each side of the house, each room, and each roof segment as a separate block. Once a block is clear, move to the next one without repeatedly revisiting it. If the progress counter later shows that something is missing, return to the blocks with the most complicated geometry first.
The final sweep should be slower than the bulk phase. Missing nails are often caused by perspective, elevation, or an object partially covering the interaction point. Check behind and above furniture, inspect the underside of platforms, and look for sections that appear complete from one angle but remain unfinished from another.
A high completion counter does not guarantee that the remaining nail is visible. Slow down near the end and search by location category instead of circling the same area repeatedly.
Hidden Nail Search and Mistake Prevention
The last portion of a completion run is usually a search problem. Visible walls are easy to clear, but hidden nails can appear in upper sections, behind furniture, inside the house structure, near fences, or below a floor line. A consistent checklist prevents the most common mistake: assuming the final area is complete because it looks finished from the entrance.
Use interaction range to reduce awkward repositioning, but do not treat it as a replacement for visual inspection. Range can help collect or target a nearby nail, while the camera angle determines whether you notice the object in the first place. Jumping is especially important after new access becomes available.
| Search Zone | What to Inspect | Why It Is Missed |
|---|---|---|
| Upper walls | High corners, wall tops, and sections above normal eye level | Camera angle hides elevated targets |
| Roof | Roof edges, raised platforms, and landing areas | These locations may require jump access |
| Interior | Rooms, door areas, storage spaces, and wall sections | Furniture and narrow geometry block visibility |
| Furniture | Tables, benches, chairs, and object edges | Targets can blend into nearby props |
| Lower structure | Fence lines, floor edges, and below-floor areas | The nail may sit outside the normal walking view |
Final Completion Checklist:
- Upgrade hammer speed before starting the main sweep
- Carry enough nails to finish a connected section
- Clear lower exterior, interior rooms, upper areas, and roof sections
- Inspect furniture, wall edges, fences, and hidden interior spaces
- Use jump access, interaction range, or vacuum utility during final cleanup
A common inefficient pattern is to search the same visible wall several times while ignoring the roof or a room behind the main path. To avoid this, record the direction of your sweep mentally: clockwise around the exterior, then room by room inside, then upward. This creates a repeatable route that can be reused on later attempts.
Another mistake is spending resources without checking the current bottleneck. If you are frequently walking back for nails, pickup amount has more value than a specialized effect. If you are standing beside a target but cannot interact cleanly, range may help more than another general upgrade. Match the upgrade to the delay you are actually experiencing.
Use the same order every time: lower exterior, interior rooms, upper level, roof, furniture, then hidden or below-floor areas. A fixed pattern makes missed locations easier to identify.
The completion counter is useful, but it should support your route rather than replace it. When progress stops increasing, identify which category has not been checked instead of wandering. A disciplined search turns the final stage from guesswork into a short verification pass.
Fastest Completion FAQ
The best strategy combines fast hammering with efficient navigation. Players who only increase swing speed may still lose time through low pickup capacity, poor routing, or repeated searches. The strongest completion attempts address all three areas together.
Q: What is the best first upgrade for Hammer these nails fastest completion?
Hammer speed is the best general first choice because it affects repeated work across walls, floors, and other nail targets. If speed is unavailable, choose pickup amount or interaction range based on your current bottleneck.
Q: Should I search for hidden nails before finishing the visible areas?
Usually, clear visible connected sections first. Save the detailed hidden-nail search for the final sweep, but inspect elevated areas as soon as jump access becomes available so they do not remain outside your route.
Q: Where should I look when one nail is missing?
Check upper walls, roof edges, furniture, interior corners, fence lines, and locations below or behind the visible floor structure. These areas are easy to overlook because the target may not be visible from the normal approach.
Q: Is interaction range more useful than pickup capacity?
It depends on the delay. Pickup capacity is stronger when supply trips consume time, while interaction range is stronger when targets are awkwardly positioned around furniture, corners, or narrow spaces.
| Situation | Best Adjustment | Expected Benefit |
|---|---|---|
| Hammering feels slow | Prioritize speed | Faster repeated interactions |
| Too many supply trips | Increase pickup amount | Longer uninterrupted work |
| Targets are hard to reach | Increase interaction range | Less repositioning |
| Roof or upper areas remain unclear | Use jump access | Better visibility and access |
| Final counter stops short | Run the fixed search pattern | More reliable hidden-nail discovery |
For most players, the most dependable setup is speed first, pickup capacity second, and interaction range third. Adjust that order only when your current route clearly shows a different source of wasted time.
The fastest completion route is not a single trick. It is a repeatable system: prepare supplies, select practical upgrades, clear areas in connected groups, use vertical access, and finish with a location-based sweep. Once that pattern becomes familiar, large nail counts become easier to manage and the final missing target is less likely to interrupt an otherwise efficient run.