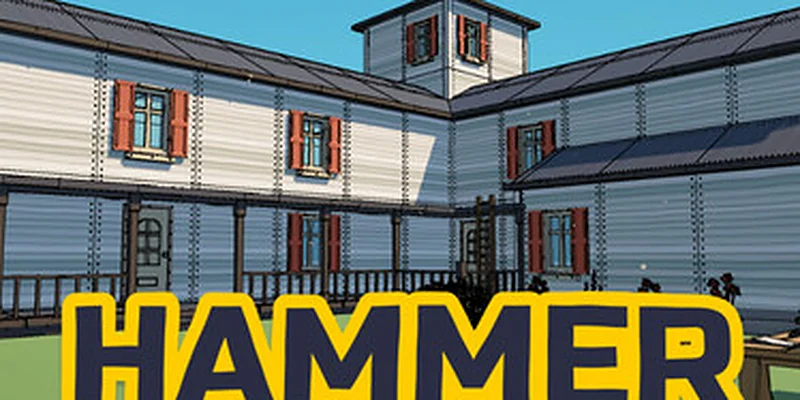
- Hammer these nails satisfying gameplay centers on collecting, placing, and hammering nails across a rebuildable house.
- Start with small objects to earn money quickly before investing in larger structures or the fence.
- Prioritize range and handling speed to reduce movement, placement delays, and missed targets.
- Use auto-placement and chain lightning when many nearby nails are ready to hammer.
- Explore every room because ducks, upgrades, and new movement options support full completion.
Hammer these nails satisfying gameplay: Core Loop
Hammer these nails satisfying gameplay comes from a simple three-part loop: collect loose nails, place them into unfinished objects, and hammer completed groups into position. Every repaired object contributes to house restoration while also providing money for upgrades. The loop begins slowly, but the pace improves sharply once selection radius, hammer range, and nail handling speed are upgraded.
The house is not just a backdrop. Benches, windows, doors, furniture, the dog house, porch sections, and fence pieces all act as separate repair targets. This makes progress easy to read: unfinished objects remain visible, while completed areas gradually become cleaner and more restored.
Video Highlights:
- Collecting nails and placing them into object slots
- Using hammer range and multi-hammering to repair several nails together
- Buying upgrades such as selection radius, handling speed, and chain lightning
- Opening new areas and finding collectible ducks during exploration
| Gameplay Phase | Main Action | Immediate Benefit |
|---|---|---|
| Collect | Pick up loose nails from the area | Builds your working supply |
| Place | Insert nails into unfinished slots | Prepares objects for completion |
| Hammer | Strike placed nails with the hammer | Repairs objects and earns money |
| Upgrade | Spend money on permanent improvements | Increases speed, range, or convenience |
| Explore | Enter newly opened areas | Reveals more targets, ducks, and progression |
Collect
Gather loose nails efficiently. Extra pickup capacity becomes more valuable as the house expands.
Place
Aim at the object rather than individual holes when possible. This makes automatic targeting easier to control.
Hammer
Group nearby targets before striking. Multi-hammering can finish several prepared nails in one satisfying action.
Upgrade
Reinvest early earnings into range, handling speed, and placement tools instead of chasing large structures immediately.
Repair compact objects first. They require fewer nails, pay out quickly, and let you purchase the upgrades that make larger targets much easier.
Best Early Route for Fast Progress
The most efficient early route is based on completion speed rather than object size. Small furniture, windows, compact outdoor objects, and short fence sections usually let you finish targets regularly and build an upgrade budget. Large unfinished structures may consume many nails without immediately improving your momentum.
Begin near the starting house and inspect the surrounding area before committing to the fence. Look for objects with short repair requirements, then return to the upgrade menu after each small group of completions. This keeps your hammer range and pickup radius growing together.
| Target Type | Early Value | Recommended Timing | Reason |
|---|---|---|---|
| Small furniture | High | First priority | Quick completions provide early money |
| Windows and doors | High | Early to mid-game | Often easy to identify and reach |
| Dog house | Moderate | After basic upgrades | Larger target benefits from better range |
| Porch sections | Moderate | Mid-game | Several nearby parts can be prepared together |
| Fence | Variable | Later | Large sections can delay early upgrade purchases |
Survey the Starting Area
Walk around the house and identify small objects, windows, doors, benches, and other targets with visible nail slots. Do not spend your entire supply on the largest structure immediately.
Complete Compact Targets
Pick up enough nails for one or two nearby objects, place them carefully, and hammer them as soon as they are ready. Short repair cycles create a steady cash flow.
Buy Utility Upgrades
Spend early money on selection radius, hammer range, and nail handling speed. These upgrades reduce walking and make targeting more forgiving.
Prepare Several Objects
Once placement becomes faster, load nearby furniture, windows, and porch pieces before using a wide hammer strike or chain lightning.
Return to Large Structures
Tackle the fence and bigger house sections after your range and placement tools improve. The same targets become much less tedious later.
A big object may look productive, but it can tie up your nails and time. If an upgrade is still affordable, finish smaller targets first and improve your tools before returning.
Upgrade Priorities and Ability Choices
The upgrade system determines how quickly the repair loop changes from deliberate work into rapid area clearing. Permanent improvements are especially valuable because they affect every future target. Temporary or active abilities can produce dramatic bursts, but they are most effective after the basic controls feel comfortable.
Selection radius helps collect nearby nails and interact with targets from a more forgiving distance. Hammer range expands the number of nails affected by a strike. Nail handling speed reduces the delay between collecting and placing, while extra nails increase the amount gathered during each pickup.
| Upgrade | What It Improves | Priority | Best Use |
|---|---|---|---|
| Selection radius | Nail pickup and interaction reach | High | Early exploration and crowded areas |
| Hammer range | Area affected by each strike | High | Furniture, fences, and clustered targets |
| Nail handling speed | Pickup and placement tempo | High | Faster continuous repairs |
| Extra nails | Nails collected per pickup | Medium | Large repair groups |
| Auto-placement | Moves nails into nearby slots | Medium to high | Dense objects and extended sessions |
| Vision | Reveals missing or incomplete nails | Situational | Final cleanup and completion checks |
| Chain lightning | Connects a strike to another nail | Medium | Groups with separated prepared targets |
| Vacuum | Automates nail collection or placement support | Medium | Late progression and reduced downtime |
A practical priority order is selection radius, hammer range, and nail handling speed. After that, improve auto-placement or extra nails depending on whether placement or collection is slowing you down. Chain lightning becomes more impressive when multiple objects have already been prepared.
The active lightning ability is entertaining and useful, but it should not replace basic range upgrades. If targets are too far apart, a lightning strike may not clear as much as expected. Prepare nearby objects and use the ability when several nails are ready within the same working area.
Use permanent range and speed upgrades first, then add auto-placement and lightning abilities. This creates reliable progress instead of depending on cooldowns.
Placement, Range, and Targeting Tips
Targeting becomes more important as the house grows. Some objects contain nail slots that are difficult to hit directly, especially around furniture, upper walls, roofs, and narrow corners. Aim at the object itself when automatic targeting can distribute the strike. If a slot is not registering, change your angle instead of repeatedly clicking the same position.
Auto-placement is particularly helpful for walls and dense surfaces. It can prepare several nails while you move, allowing you to focus on hammering rather than manually aligning every slot. Keep in mind that a prepared nail still needs to be struck unless an ability or area effect completes it.
| Problem | Likely Cause | Practical Fix |
|---|---|---|
| A nail will not register | Aim is slightly off or the slot is occluded | Target the main object and change your angle |
| Placement feels slow | Handling speed is underdeveloped | Buy nail handling upgrades |
| Upper targets are unreachable | Hammer range or movement options are limited | Upgrade reach and unlock additional movement |
| A strike hits too few nails | Targets are spread apart | Prepare a denser group or reposition |
| The area looks unfinished | Missing nails are difficult to see | Use vision support and inspect each side |
| Nail supply runs out quickly | Too many targets were started at once | Finish smaller groups before expanding |
The game also rewards vertical exploration. New movement options make previously awkward areas accessible, including upper sections of the house. Once jumping becomes available, revisit rooftops, upper walls, and raised platforms instead of assuming the ground route contains every target.
Ducks are separate exploration objectives. They are easy to overlook when focusing on repairs, so include them in your route whenever a new room or section opens. A full restoration run is more than reaching a nail milestone; it also involves checking hidden spaces and collectibles.
If direct slot targeting feels inconsistent, aim at the center of the object and let the hammer’s area effect handle nearby nails. Use a closer angle only for isolated or obstructed slots.
Completion Checklist and Final Cleanup
Progress is measured through both repair milestones and exploration. The house can look nearly finished while still hiding a nail on a rear wall, upper surface, window frame, or side object. A final cleanup route prevents unnecessary backtracking.
The main progression includes opening interior areas, reaching major nail milestones, unlocking movement options, and completing the exterior. The fence is best handled after the core house route is comfortable because its long stretches benefit heavily from range, auto-placement, and area hammering.
Final Completion Checklist:
- Repair the starting furniture and compact outdoor objects
- Upgrade selection radius, hammer range, and nail handling speed
- Open the house interior and inspect every accessible room
- Revisit upper areas after unlocking jump movement
- Complete the house, porch, windows, doors, and fence
- Search for ducks and check both sides of every structure
- Use vision or a careful sweep to locate remaining nails
| Completion Goal | Recommended Check |
|---|---|
| House restoration | Walk around every exterior wall and inspect upper sections |
| Interior access | Enter each opened room and check corners |
| Fence completion | Follow the fence in one direction rather than jumping between sections |
| Duck collection | Search rooms, outdoor spaces, and newly unlocked areas |
| Final nail cleanup | Use vision support, then rotate around the structure |
| Movement progress | Test jump access on roofs, ledges, and upper platforms |
For a satisfying final pass, stop collecting new targets and focus on one structure at a time. Finish the front, then one side, then the rear, and finally the opposite side. This systematic route makes it easier to notice a single missing slot.
Do not judge progress only by the money counter. A careful completion run also checks hidden nails, opened rooms, upper surfaces, and collectible ducks.
FAQ
Q: What makes Hammer these nails satisfying gameplay?
The game combines simple nail collection with visible restoration, fast upgrade feedback, multi-hammering, auto-placement, and chain lightning. Each improvement makes the next repair group feel faster and more substantial.
Q: Which upgrades should I buy first?
Selection radius, hammer range, and nail handling speed are strong early priorities. They reduce walking, improve targeting, and shorten the time between collecting and placing nails.
Q: Should I repair the fence early?
Usually, finish smaller objects first. The fence can require many nails and may slow your first upgrades, while compact targets provide quicker completions and cash.
Q: How do I find missing nails during cleanup?
Inspect every side of each structure, including upper walls, roofs, windows, rooms, and corners. Vision support can help reveal incomplete areas, while a consistent clockwise sweep reduces missed sections.
For the smoothest run, combine a small-object opening route with permanent range upgrades, then use auto-placement and lightning to clear dense late-game areas.