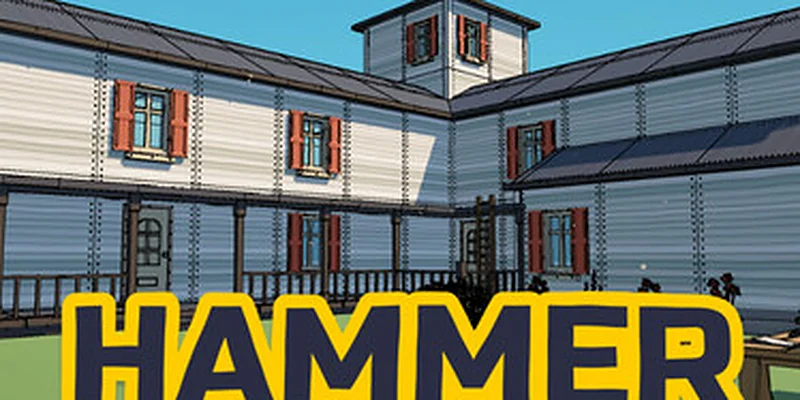
- Hammer these nails hammer upgrades improve speed, reach, collection, and automation.
- Nail handling speed is a strong early priority because placing nails can limit progress.
- Selection radius and range reduce movement and make larger structures easier to clear.
- Vacuum and dispenser abilities support steady automation while you work elsewhere.
- Lightning and vision are situational tools that become more useful during large cleanup phases.
Hammer these nails hammer upgrades explained
Hammer these nails uses a simple progression loop: collect nails, place them into construction points, hammer them in, and spend the resulting money on upgrades. The most important distinction is between upgrades that improve direct interaction and abilities that continue working while you move around the area.
A good build does not maximize one stat immediately. Instead, it removes the current bottleneck. Early progress may feel limited by picking up nails, while later sections usually slow down because placing targets takes longer or because unfinished nails are hidden around large structures.
| Upgrade group | Main effect | Best use |
|---|---|---|
| Strength | Increases hammer damage and speeds up hammering | Faster completion of each target |
| Range | Extends interaction distance | Reaching distant boards and upper sections |
| Selection radius | Selects more nearby nails or targets | Clearing dense areas efficiently |
| Nail handling speed | Reduces pickup and placement delay | Improving the main manual workflow |
| Vacuum | Collects nails automatically over time | Maintaining supply during construction |
| Dispenser | Places nails automatically | Supporting progress while repositioning |
| Vision | Reveals incomplete or missing nails | Final cleanup and hidden objectives |
Spend money on the action that currently consumes the most time. Faster hammering is valuable, but it cannot solve a placement bottleneck by itself.
What to prioritize first
For most runs, nail handling speed is the safest early investment. The upgrade affects the repeated cycle of picking up nails and placing them into slots, so its value appears across nearly every structure. A larger selection radius is also useful because it lets you gather nearby nails without standing directly on top of each one.
Strength becomes more important once the construction area contains many filled slots. Range is excellent when targets are spread across walls, fences, windows, or elevated sections. Automation should be added once you have enough nails flowing through the area to keep those abilities active.
| Progress phase | Recommended focus | Reason |
|---|---|---|
| Opening phase | Handling speed, selection radius | Speeds up repeated manual actions |
| Expansion phase | Strength, range | Makes larger targets easier to complete |
| Automation phase | Vacuum, dispenser | Keeps progress moving between routes |
| Cleanup phase | Vision, ability range | Finds hidden or incomplete targets |
| Final push | Lightning, cooldown improvements | Helps process dense groups quickly |
Best upgrade order for efficient runs
The strongest upgrade path is based on efficiency rather than a fixed shopping list. Begin with improvements that affect every interaction, then add tools that reduce travel and finish larger groups. This approach also works well when attempting a faster completion time.
Handling Speed
Primary early pick. Reduces the delay between collecting and placing nails, which improves the most common action loop.
Selection Radius
Reliable utility choice. Pulls nearby nails and targets into easier collection and interaction ranges.
Range
Strong mid-run upgrade. Helps reach distant surfaces, high sections, and targets separated by obstacles.
Automation
Scaling choice. Vacuum and dispenser abilities keep the work area supplied while you change positions.
A practical order is handling speed, selection radius, range, automation, then situational power upgrades. Adjust this order if your current route has a clear weakness.
Manual upgrades versus abilities
Manual upgrades improve what you do directly. Abilities create additional value around you and can affect several nearby construction points. The best results come from combining both categories instead of treating abilities as replacements for basic stats.
| Tool | Manual or active | Strength | Limitation |
|---|---|---|---|
| Hammer strength | Manual stat | Speeds up direct hammering | Less useful when slots are not placed |
| Selection radius | Manual stat | Reduces precise positioning | Does not automatically complete targets |
| Nail handling | Manual stat | Improves collection and placement | Requires continued player input |
| Vacuum | Active ability | Collects nails over time | Needs time to produce value |
| Dispenser | Active ability | Places nails while you route elsewhere | May work best near active construction |
| Lightning | Active ability | Can affect nearby nails or targets | Most efficient against grouped work |
| Vision | Active or utility ability | Reveals unfinished areas | Less important when the route is already clear |
When to buy strength
Strength is worth buying when the hammering animation or repeated hits become the slowest part of a target. If you are still waiting on nails to arrive or placing them one at a time, handling speed usually produces a better return first.
A useful test is simple: complete one medium section and compare the time spent placing nails against the time spent hammering. Upgrade the longer phase, then repeat the test after the next purchase.
How to use abilities and cooldowns
Abilities are most effective when used during dense construction phases. Activating them on a single isolated nail wastes much of their potential, while saving every ability for the final minutes can leave earlier progress unnecessarily slow.
Lightning is particularly useful when several nearby nails are already placed. Its value increases when the target has multiple connected sections, such as fences, walls, or broad exterior panels. Vacuum and dispenser effects are more consistent and can be activated before you begin a longer route.
Prepare the area
Collect or place enough nails around a dense group. Abilities are more valuable when several targets are ready to process.
Activate automation
Use Vacuum or Dispenser before moving away. This lets the area continue generating progress while you reposition.
Trigger area effects
Use Lightning when multiple nearby nails can benefit. Avoid spending it on a lone target unless the cooldown is about to be wasted.
Hammer in a controlled pattern
Sweep across the section rather than clicking randomly. A steady left-to-right or top-to-bottom route helps prevent missed nails.
Finish with detection tools
Use Vision during cleanup to reveal incomplete slots hidden behind objects or outside your normal camera angle.
Do not activate a group ability simply because it is ready. Wait for a dense target unless delaying the activation would leave the cooldown unused.
Ability timing by target type
| Target type | Best ability | Timing |
|---|---|---|
| Small object | Handling speed | Use manual upgrades instead of long cooldowns |
| Fence section | Lightning | Activate after several nails are placed |
| Large wall | Dispenser and Lightning | Start automation, then process grouped sections |
| Hidden corner | Vision | Use during route checks and cleanup |
| Long travel route | Vacuum | Activate before leaving the current work area |
Route planning and construction cleanup
Efficient routing matters because Hammer these nails rewards completed construction, not just fast hammer swings. A scattered route can leave small unfinished objects behind, forcing a long backtrack near the end of the run.
Start by clearing compact, low-cost objects close to your starting position. These provide early money and let you purchase upgrades before committing to large structures. After that, choose one direction around the property and keep moving through connected targets.
| Route style | Advantages | Drawbacks |
|---|---|---|
| Small-to-large | Builds early upgrade money | Large structures are delayed |
| Near-to-far | Reduces walking distance | May leave scattered targets |
| Perimeter sweep | Good for fences and exterior sections | Can miss interior objects |
| Structure-by-structure | Easy to track completion | May require longer travel |
| Mixed route | Adapts to available upgrades | Requires stronger awareness |
Use a consistent sweep pattern and check completed areas before leaving. A missed nail on a small object can cost more time later than the object itself required.
Managing large structures
Large structures should usually be divided into visible sections. Fill one section, hammer it, then move to the next. This makes missed nails easier to identify and prevents the camera angle from hiding unfinished work.
Do not assume that a large visual object has a higher reward than a small one. The efficient choice is the target that can be completed quickly with your current upgrades. Smaller objects are often useful early because they provide money without requiring extensive movement.
Movement and vertical areas
Upper sections, roofs, towers, and interior spaces can become difficult when range is low. Upgrade range before spending too much time trying to align the camera with distant targets. When jumping or climbing is available, use it only after nearby ground-level targets are checked.
The final route should include:
- Exterior walls and fences.
- Windows, doors, and elevated sections.
- Interior furniture or small objects.
- Hidden corners behind structures.
- Any remaining nails revealed by Vision.
Completion checklist and final strategy
A fast run depends on consistent execution more than one perfect upgrade purchase. Keep the work area supplied, use abilities against grouped targets, and reserve a final inspection for hidden or elevated sections.
Essential Run Checklist:
- Buy nail handling speed before committing to large structures
- Increase selection radius to reduce collection and placement delays
- Use range upgrades before tackling distant or elevated targets
- Activate Vacuum and Dispenser during longer route sections
- Use Vision for the final sweep and check every structure
Walk the area in a fixed loop, inspect each structure from multiple angles, and clear isolated nails before spending time on optional collectibles.
A practical endgame build
By the late game, a balanced setup should include improved manual speed, enough range to reach distant sections, and at least one reliable automation tool. Lightning is strongest when the remaining work is concentrated, while Vision becomes increasingly valuable when the progress indicator suggests that only a few targets remain.
| Endgame need | Preferred solution | Why it helps |
|---|---|---|
| Too many nails to place | Nail handling speed | Reduces repeated placement delays |
| Targets are spread out | Range | Limits repositioning |
| Nails are hard to collect | Selection radius and Vacuum | Improves supply consistency |
| Large groups remain | Lightning | Processes nearby targets efficiently |
| Progress is nearly finished | Vision | Reveals missed or hidden nails |
| Travel interrupts progress | Dispenser | Continues placing nails during movement |
Common mistakes
- Buying only strength while ignoring placement speed.
- Using Lightning on isolated targets.
- Leaving small objects unfinished until the final minute.
- Moving to a new area before checking the current structure.
- Forgetting that automation works best when activated before travel.
- Treating collectibles as more important than required construction during a timed attempt.
Q: What are the best Hammer these nails hammer upgrades for beginners?
Start with nail handling speed and selection radius. These upgrades improve the repeated collection and placement loop, making every early structure easier to complete.
Q: Should I buy strength or range first?
Buy strength when hammering is the main bottleneck. Choose range when targets are distant, elevated, or difficult to reach from normal positions.
Q: When should I use Lightning?
Use Lightning against grouped targets with several placed nails, such as fences, walls, and broad construction sections. It is less efficient on isolated nails.
Q: Is Vision necessary for every run?
Vision is not always an early priority, but it is highly useful during cleanup because it can reveal incomplete nails hidden behind objects or outside your normal route.