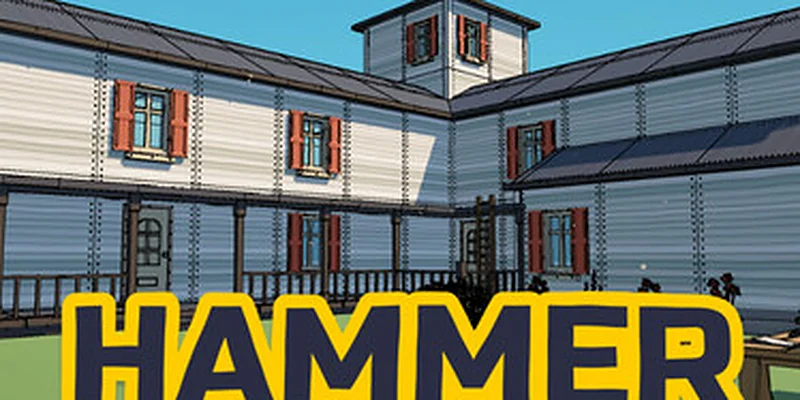
- Hammer these nails nail mechanics revolve around collecting, placing, and striking nails efficiently.
- Small objects usually provide the fastest early income and help fund important upgrades.
- Selection radius improves multi-nail targeting, while handling speed reduces repetitive downtime.
- Active abilities are strongest when several nearby sections are fully prepared.
- Movement upgrades open higher surfaces and make roof or elevated structures easier to finish.
Hammer these nails Nail Mechanics Explained
The core Hammer these nails nail mechanics are built around a simple loop: collect loose nails, place them into unfinished objects, hammer the filled slots, and use the resulting money to improve your work speed. The system starts slowly, but each upgrade reduces a different source of friction.
A useful way to understand progression is to separate the work into four stages:
| Stage | Main Action | Primary Goal | Best Focus |
|---|---|---|---|
| Collection | Pick up loose nails | Build a usable supply | Pickup speed |
| Placement | Send nails into open slots | Prepare structures | Handling speed |
| Hammering | Strike filled slots | Complete sections | Strength and radius |
| Progression | Spend earned money | Increase efficiency | Upgrade synergy |
Structures are divided into smaller completion sections. A door, bench, table, wall panel, window, fence segment, or roof section may pay independently when its required nails are finished. This makes partial completion valuable: you do not always need to finish an entire building before receiving progress.
Prioritize compact objects and clearly separated sections first. They provide quick completion feedback, expose the game’s targeting rules, and help finance your first efficiency upgrades.
Collect
Gather enough nails before committing to a large structure. A full hand reduces repeated trips across the work area.
Place
Aim at the correct object and fill its visible slots. Placement speed becomes increasingly important as structures grow larger.
Hammer
Move through prepared sections in a controlled line. Multi-target strikes are more valuable when nails are grouped closely.
The most important early lesson is that the largest visible structure is not always the best target. Large walls and fences may consume many nails before producing a meaningful payout, while smaller fixtures can deliver faster returns. Use compact work as a way to build momentum, then shift toward large sections after your hammering range and strength improve.
Core Resource Priorities
Nails are the main physical resource, but time and attention are equally important. Carrying too few nails creates unnecessary travel, while carrying too many before upgrading can leave you working through a slow placement cycle.
| Resource | What It Controls | Early Priority | Later Priority |
|---|---|---|---|
| Nails | How long you can work continuously | High | High |
| Money | Access to upgrades | High | High |
| Hammer strength | Damage per strike | Medium | Very high |
| Selection radius | Number of nearby targets | High | Very high |
| Handling speed | Pickup and placement delay | Very high | High |
| Movement access | Reachable areas | Low | High |
A balanced early purchase order is usually more reliable than focusing on only one stat. Handling speed makes every task smoother, selection radius increases the value of each strike, and strength helps finish sections after they are prepared.
Large structures can absorb more nails than expected. Keep a reserve available before starting a long wall, fence, or roof section, especially when your pickup route is still slow.
Step-by-Step Progression Route
Use this route when starting a fresh area or returning after unlocking new movement options. The objective is to turn short jobs into a stable upgrade cycle before tackling the most demanding structures.
Survey the Work Area
Walk around the accessible space and identify small objects, separated panels, windows, doors, and nearby nail piles. Look for structures that can be completed without difficult camera angles or elevated positioning.
Build a Nail Reserve
Collect a practical batch before beginning. Avoid repeatedly picking up single nails unless an object is nearly complete and the remaining slots are close by.
Finish Compact Sections
Complete tables, chairs, benches, fixtures, and other small targets first. These jobs are useful for learning which objects register as separate payment sections.
Buy Efficiency Upgrades
Spend the first earnings on handling speed, selection radius, or a similar upgrade that improves repeated actions. Choose upgrades that benefit every future structure rather than one isolated task.
Prepare Large Structures in Batches
Deposit nails across one connected section, then activate hammering abilities. This prevents cooldowns from being wasted while you are still collecting or placing nails.
The route becomes more efficient when you stop treating every nail as an individual task. Think in batches: collect, deposit, activate, and sweep. This rhythm limits backtracking and makes temporary abilities much more impactful.
| Situation | Recommended Response | Why It Works |
|---|---|---|
| Few nails nearby | Finish a small object | Avoids a long collection trip |
| Many open slots together | Deposit in one batch | Improves placement efficiency |
| Several sections are prepared | Use an active ability | Converts setup time into fast completion |
| Targets are spread apart | Increase radius or strength | Reduces missed strikes |
| High surfaces are inaccessible | Search for movement access | Unlocks a new work layer |
An active ability is most valuable after nails are already placed across a dense section. Prepare first, then trigger the ability and sweep through the target area without stopping.
Do not rush into elevated areas simply because they are visible. If your character cannot reach a roofline or upper wall, search the surrounding space for a movement upgrade or access point. Progression often depends on finding the tool that changes where you can work, not merely increasing damage.
Upgrade Priorities and Ability Synergy
Upgrades generally fall into three categories: basic stats, activated abilities, and access tools. The best choice depends on the structure currently blocking your progress, but some upgrades provide value across nearly every job.
Handling Speed
Reduces the delay between collecting and placing nails. Best for players who spend most of their time preparing structures.
Selection Radius
Lets one hammer action affect a wider cluster. Strong when nails are grouped tightly on panels or furniture.
Hammer Strength
Improves completion speed after placement. Especially useful for dense walls, fences, and roof sections.
Reach and Movement
Opens higher or awkward targets. Necessary when progress is limited by elevation rather than damage.
| Upgrade Type | Best Use Case | Strength | Limitation |
|---|---|---|---|
| Handling speed | Frequent pickup and placement | Consistent value | Does not solve poor targeting |
| Selection radius | Dense nail clusters | Clears groups quickly | Less useful when slots are scattered |
| Hammer strength | Large prepared sections | Shortens finishing time | Needs enough nails already placed |
| Lightning-style ability | Multiple nearby targets | Can chain through a prepared area | Requires good positioning |
| Vacuum-style ability | Loose nails across a zone | Reduces collection downtime | Less important when supplies are nearby |
| Reach upgrade | High or distant slots | Expands workable space | May not replace a movement unlock |
| Dispenser-style ability | Repeated placement work | Accelerates setup | Best after collecting a large batch |
A strong general sequence is handling speed first, followed by selection radius, then hammer strength. This sequence keeps the basic loop comfortable while improving the value of every later ability.
Active abilities should not be used randomly. Match them to the task:
- Use a collection ability before beginning a long structure.
- Use a placement ability while several adjacent sections are empty.
- Use a lightning or chain effect when many targets are already filled.
- Use a reach enhancement when the main problem is distance or elevation.
- Use a vision or detection effect when a nearly finished area contains hidden gaps.
The best upgrade is the one that shortens your most repeated delay. If collecting is slow, improve pickup efficiency. If filled sections take too long, prioritize radius or strength instead.
A common mistake is buying an impressive active ability while ignoring basic stats. Activated powers can feel powerful, but passive improvements continue working during every collection trip, placement cycle, and hammer sweep.
Targeting, Camera Control, and Efficient Routes
Targeting is one of the most important practical skills in Hammer these nails. A nail can be visible without being comfortably selectable, especially near the bottom of an object, behind a railing, or on a roof edge. Better positioning often saves more time than another damage upgrade.
Use the following route pattern:
- Stand at the center of the current section.
- Deposit nails while facing the object directly.
- Move in a short horizontal or vertical sweep.
- Check the corners before leaving.
- Return only after confirming that the section registered as complete.
| Target | Recommended Position | Common Problem | Adjustment |
|---|---|---|---|
| Furniture | Face the object from its open side | Nearby items receive focus | Move closer and isolate the target |
| Door panels | Stand slightly off-center | Slots overlap with the frame | Use a shallow side angle |
| Fence lines | Follow the fence direction | Sections are easy to skip | Sweep one segment at a time |
| Roof edges | Use elevated access | Lower camera angle hides slots | Jump or reposition before striking |
| Small fixtures | Stand close and centered | Radius reaches another object | Reduce movement between strikes |
When a target refuses to register, avoid repeatedly clicking from the same position. Move around the object, change your height, or approach from another angle. Some problems are not caused by insufficient strength; they come from line-of-sight and selection overlap.
Before leaving an area, trace its outer edge and inspect corners, lower panels, and elevated sections. Stragglers are easier to find while the structure is still familiar.
The most efficient route is usually a loop rather than a straight line. Start near the nail supply, work through the closest compact objects, move to larger connected sections, and return to the supply only when your reserve is low. This keeps travel predictable and makes it easier to reuse temporary abilities.
Before Leaving a Work Area:
- Complete nearby small objects and separated fixtures
- Check lower corners and partially hidden slots
- Use available abilities before their cooldowns are wasted
- Confirm that large sections visibly register as finished
- Look for movement or access upgrades before abandoning high targets
Advanced Completion Strategy
Once the basic loop feels comfortable, shift from individual-object thinking to area management. The goal is to prepare several nearby targets, then clear them in a continuous sequence.
A good advanced cycle looks like this:
| Phase | Action | Efficiency Goal |
|---|---|---|
| Reconnaissance | Mark nearby unfinished sections | Avoid unnecessary movement |
| Collection | Gather a large but practical batch | Reduce supply trips |
| Preparation | Fill several connected targets | Create ability value |
| Burst | Activate abilities and hammer rapidly | Clear the prepared zone |
| Review | Search for missed slots | Prevent repeated travel |
Large fences, walls, and rooflines are best handled after your selection radius and strength have improved. Deposit nails across a manageable portion instead of trying to prepare the entire map at once. This gives you clear checkpoints and reduces the chance of running out of nails halfway through.
Small fixtures remain valuable even later. They can provide quick money between cooldowns, reveal hidden interactions, and help fund the final stat upgrades needed for the most expensive sections.
A fast sweep that leaves several missed nails can be slower than a controlled pass. Accuracy matters most near corners, elevated surfaces, and objects with overlapping hit zones.
Optional collectibles and unusual objects are worth checking after the main work is complete. They may require a separate search pattern, movement access, or a higher camera position. Treat exploration as a second pass so it does not interrupt the primary income route.
Q: What are the most important Hammer these nails nail mechanics for beginners?
The essential loop is collecting nails, placing them into open slots, hammering completed sections, and reinvesting the money into efficiency upgrades. Start with small targets so you can learn the targeting rules safely.
Q: Which upgrade should I buy first?
Handling speed is a strong general starting point because it reduces repeated pickup and placement delays. Selection radius is another useful early choice when many nails are grouped closely together.
Q: Why can I see a nail but fail to hammer it?
The problem is usually positioning, line-of-sight, or selection overlap rather than strength. Move around the object, change your height, or approach from a different angle before spending resources on damage.
Q: When should I use active abilities?
Use them after preparing a dense group of sections. Collection and placement abilities help during setup, while chain or hammering effects are most effective when multiple nearby targets are ready.