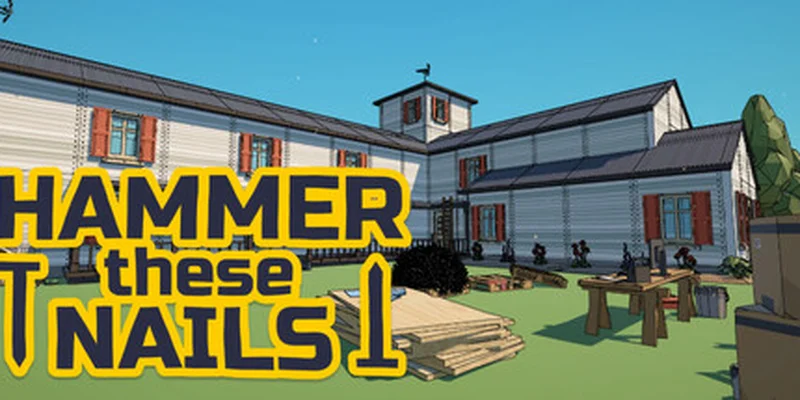
- Hammer these nails progression guide: Build momentum by clearing nearby nail groups before chasing distant targets.
- Best opening upgrades: Prioritize selection radius, nail handling speed, and extra nail capacity.
- Core strategy: Collect nails in batches, use wide hammer coverage, and finish one structure section at a time.
- Ability timing: Save Dispenser, Vacuum, Reach, and Lightning for dense or elevated sections.
- Exploration goal: Search newly opened rooms for hidden rubber ducks and additional nail targets.
Hammer these nails Progression Guide Basics
Hammer these nails progression guide planning starts with one simple rule: improve the speed of every action you repeat. The game revolves around collecting loose nails, placing them into nearby construction slots, and hammering those nails into a growing structure. Early progress feels slow because each action is narrow, but upgrades gradually turn the same loop into a wide-area workflow.
Your first objective is not to complete the most difficult part of the house. Instead, create a reliable cycle:
- Gather a manageable batch of nails.
- Place them into nearby slots.
- Hammer several targets with one movement.
- Spend the resulting cash on a practical upgrade.
- Repeat the cycle in the next accessible area.
The visible nail counter is useful for measuring progress, but it should not control every decision. A distant section with awkward angles can consume more time than several nearby objects. Clear accessible areas first, unlock movement options, and return to difficult targets after your range and abilities improve.
| Progression Element | What It Does | Early Priority |
|---|---|---|
| Nail pickup | Adds loose nails to your carried supply | High |
| Nail placement | Fills construction slots | High |
| Hammering | Completes placed nails and structures | High |
| Cash rewards | Funds upgrades | Medium to high |
| Milestones | Open additional areas or rooms | High |
| Rubber ducks | Optional exploration targets | Medium |
Batch Collector
- Gather multiple nails before returning to a structure.
- Increase capacity when repeated trips slow progress.
- Use the widest practical pickup radius.
Precision Builder
- Work on one wall, roof section, or object at a time.
- Move slowly around small targets.
- Recheck completed areas before leaving.
Ability Specialist
- Save active abilities for dense groups.
- Use Reach on elevated surfaces.
- Use Vision when completed sections become difficult to verify.
Do not spend your first rewards on every available option. A stronger pickup and hammering loop usually produces more progress than a situational ability used too early.
Best Upgrade Order for Faster Progress
The upgrade screen contains several improvements that affect different parts of the construction loop. The strongest early path focuses on upgrades that reduce repeated movement and increase the number of nails handled during each pass.
Start with Selection Radius if you frequently miss nearby nails or need to stand in an exact position. This upgrade makes the opening collection phase less tedious and helps you gather from a wider area. After that, invest in Nail Handling Speed so the transition from carrying nails to placing them becomes faster.
Strength and Range become more valuable as construction surfaces grow larger. Strength improves hammer impact, while Range extends the area affected by hammer interactions and related actions. These upgrades are especially helpful when targets are spread across large walls, roofs, fences, and upper sections.
| Upgrade | Main Benefit | Recommended Timing | Best Use |
|---|---|---|---|
| Selection Radius | Collect nails from a wider area | First upgrades | Loose nails near the player |
| Nail Handling Speed | Places nails more quickly | Early | Repeated wall and floor sections |
| Extra Nails | Carries more nails per trip | Early to mid | Large construction zones |
| Strength | Improves hammer performance | Mid | Dense or stubborn nail groups |
| Range | Extends interaction coverage | Mid to late | Roofs, fences, and broad walls |
| Vision | Reveals missing or incomplete nails | Late | Cleanup and final checks |
A useful rule is to alternate between collection improvements and hammering improvements. If you can gather nails quickly but cannot place them efficiently, handling speed should come next. If you can place nails rapidly but struggle to reach them, range or strength becomes the better investment.
Active abilities should support this upgrade plan rather than replace it. Dispenser helps place nails into adjacent slots automatically, while Vacuum pulls nearby nails into your working area. Reach is suited to elevated or distant targets, and Lightning can clear connected groups when many nails are packed together.
Buying one level in every category can leave the entire build feeling weak. Choose a primary path, then add abilities when the next construction area demands them.
Step-by-Step Construction Route
Use the following route whenever a new building area opens. It keeps the work organized and prevents repeated trips across unfinished sections.
Survey the Accessible Area
Walk around the current room, porch, wall, and nearby objects before spending resources. Identify loose nail piles, completed-looking sections, elevated targets, and any interactable doors or ladders. This short survey helps you choose a route instead of moving randomly.
Collect a Practical Batch
Pick up enough nails to cover the nearest group without filling your inventory unnecessarily. A moderate batch is easier to place accurately, especially around small objects such as chairs, signs, tables, and other detailed props.
Fill Slots Before Hammering
Place nails into adjacent construction slots, then begin hammering once the area is populated. This creates a clear work zone and lets wide-range effects hit several targets in sequence.
Finish One Section Completely
Prioritize a single wall, roof face, fence segment, or room rather than touching every object at once. When the section appears complete, circle it once more to find missed nails before moving onward.
Spend Rewards and Recheck Access
Use earned cash on the upgrade that solves your current obstacle. Then inspect newly accessible doors, upper paths, rooms, or movement options before returning to unfinished construction.
The most important part of this route is the final recheck. Progression areas can hide nails behind doors, above the player, on the far side of a structure, or inside rooms that become available after a milestone. If a section appears complete but the reward does not trigger, assume that one or more targets remain outside your immediate view.
| Construction Area | Preferred Method | Common Problem |
|---|---|---|
| Small objects | Slow movement and direct placement | Narrow slots are easy to miss |
| Walls | Fill a broad section, then sweep across it | Upper targets may sit outside normal view |
| Roofs | Unlock movement or Reach first | Roof surfaces can require a higher angle |
| Fences | Use Range, Lightning, or wide hammer coverage | Long sections hide isolated missed nails |
| Interior rooms | Explore corners before leaving | Doors may reveal additional work |
Treat a construction section as finished only after its reward appears or Vision confirms that no incomplete nails remain.
Milestones, Exploration, and Hidden Targets
Progression is not limited to the main structure. New rooms and movement options can appear after reaching nail milestones, so exploration should be part of the normal route rather than a separate activity. When a door opens, enter immediately and inspect the new space before returning to an older wall.
Movement upgrades matter because several targets are placed above normal eye level. Jumping, sprinting, ladders, and expanded Reach can change which portions of the building are practical. If a nail group looks visible but cannot be reached, do not waste time repeatedly swinging from the ground. Search for a new path, a ladder, an opened room, or a movement improvement.
Rubber ducks are optional collectibles, but they reward careful exploration. Search around props, corners, elevated surfaces, rooms, and unusual objects. They can be easy to overlook while concentrating on the nail counter.
| Milestone Signal | Recommended Response | Why It Matters |
|---|---|---|
| New door opens | Enter and inspect immediately | May reveal rooms, movement tools, or new targets |
| New movement option appears | Test it near the current structure | It may solve previously unreachable areas |
| Nail count rises sharply | Recheck the active zone | Dense placement can hide unfinished targets |
| A collectible is spotted | Mark the location mentally | Return after unlocking better access |
| Progress stalls | Activate Vision or change elevation | Missing nails may be outside the current angle |
Ground Sweep
Search around benches, tables, signs, equipment, and other low objects. These areas are efficient early targets.
Vertical Sweep
Check roofs, upper walls, ladders, and elevated trim after Reach or jumping improves access.
Interior Sweep
Enter every newly available room and inspect corners, furniture, and narrow passages before returning outside.
Collectibles can wait, but inaccessible construction should not be forced. Mark the location, unlock the required movement option, and return with better range or elevation.
Efficiency Checklist and Final Cleanup
The final stages are less about earning new power and more about locating the few nails that remain. Broad abilities can make progress look dramatic while still leaving isolated targets behind. Use a deliberate cleanup pattern to avoid wandering.
Begin at the entrance of the current area and move clockwise around the structure. Check the lower walls, nearby props, upper walls, roof edges, fence sections, and interior rooms. Use Vision only after clearing the obvious targets, because a large number of highlights can be difficult to read at once.
A strong cleanup build combines high Range, reliable Nail Handling Speed, enough Extra Nails to reduce trips, and at least one ability that reveals or gathers nearby targets. The goal is not to activate every power continuously. The goal is to remove the last bottleneck.
| Cleanup Phase | Action | Upgrade Support |
|---|---|---|
| Phase 1 | Clear visible ground-level targets | Selection Radius |
| Phase 2 | Fill broad walls and objects | Nail Handling Speed |
| Phase 3 | Reach roofs and upper walls | Range, Reach, movement |
| Phase 4 | Sweep fences and exterior edges | Strength, Lightning |
| Phase 5 | Find isolated leftovers | Vision |
| Phase 6 | Verify doors and rooms | Exploration and movement |
Progression Goals:
- Upgrade Selection Radius and Nail Handling Speed early
- Build a repeatable collect, place, and hammer cycle
- Complete nearby walls and objects before distant targets
- Use Reach or movement upgrades for roofs and upper areas
- Search opened rooms for missed nails and rubber ducks
Before claiming that an area is complete, confirm the following:
- The visible construction slots are filled.
- The hammer pass reaches the entire section.
- Any upper surface has been checked from a better angle.
- Newly opened doors and rooms have been explored.
- The next upgrade directly addresses the remaining obstacle.
When only a few nails remain, stop collecting large batches. Move slowly, use Vision, and inspect one structure face at a time.
Hammer these nails FAQ
Q: What is the best early upgrade path in Hammer these nails?
Start with Selection Radius and Nail Handling Speed, then add Extra Nails. These upgrades improve the repeated collection and placement loop before the larger areas appear.
Q: Should I prioritize Strength or Range during mid-game progression?
Choose Range when targets are distant, elevated, or spread across broad surfaces. Choose Strength when you can reach targets but need more effective hammer coverage.
Q: How do I reach nails on roofs and upper walls?
Look for ladders, newly opened movement options, jumping routes, or the Reach ability. Avoid repeatedly hammering from the ground if the target remains outside your interaction distance.
Q: What should I do when the nail counter stops progressing?
Use Vision, circle the current structure, inspect the far side and upper surfaces, then check opened rooms. A single isolated nail can prevent the next reward or milestone.
The fastest reliable approach is to improve repeated actions first, complete construction in organized sections, and reserve advanced abilities for vertical, distant, or dense targets.