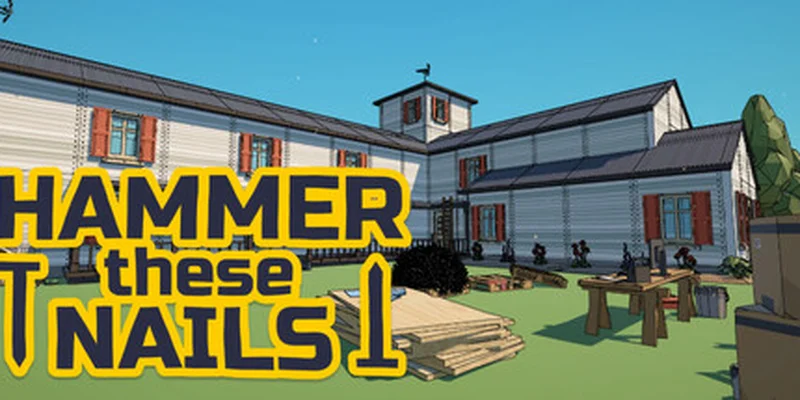
- Hammer these nails beginner guide: Follow a repeatable route from exploration to final cleanup.
- Main objective: Locate, pick up, and hammer toward the game’s 10,000-nail target.
- Best habit: Finish visible nails before leaving each area.
- Upgrade focus: Use tool improvements and abilities to reduce travel and collection time.
- Completion tip: Recheck difficult sightlines and confirm the final completion state.
Hammer these nails Beginner Guide: Core Loop
Hammer these nails is a focused single-player Steam experience built around finding and completing a large number of nail targets. The basic progression loop is simple: explore an accessible space, locate nails, pick them up, complete the hammering interaction, and use progression upgrades to make later searches more efficient.
The official Steam store page identifies the central objective as completing 10,000 nails. The game also includes tool upgrades, automatic pickup and placement options, Chain Lightning, doors, hidden areas, Steam Achievements, Steam Cloud, and Family Sharing.
| Gameplay Element | What It Means | Beginner Priority |
|---|---|---|
| Nail discovery | Search rooms, structures, and accessible outdoor areas for targets | High |
| Nail pickup | Approach and collect a discovered nail | High |
| Hammering | Complete the action so the nail contributes to progress | High |
| Exploration | Inspect routes, corners, edges, and less visible spaces | High |
| Upgrades | Improve collection, movement, or hammering efficiency | Medium |
| Doors and hidden areas | Expand the spaces available for exploration | Medium |
Explore Methodically
Search each area in one direction instead of moving randomly. A consistent route makes missed sections easier to identify later.
Finish What You Find
Complete visible nails during the first pass whenever practical. This prevents collected targets from being confused with unfinished ones.
Plan for Cleanup
Expect a final review phase. Difficult camera angles, crowded scenery, and newly accessible sections may require another visit.
Treat every area as a small checklist. Search from the entrance outward, inspect the edges, then leave only after visible targets are complete.
Step-by-Step Nail Progression
Use the following sequence for a clean first playthrough. It avoids unnecessary backtracking while leaving room for a structured final sweep.
Learn the Interaction Loop
Start by learning how to move, approach a nail, pick it up, and complete the hammering action. Do not rush into a broad search before the basic interaction feels familiar.
Clear the Starting Area
Search the opening space from one side to the other. Look at normal sightlines first, then inspect corners, edges, elevated surfaces, and objects that partially block visibility.
Track Completed Targets
Separate nails that have been collected from nails that have also been hammered. Your useful progress is the number of completed nails, not simply the number of objects noticed.
Expand Into Accessible Spaces
Move into newly available areas after finishing the obvious targets nearby. Complete one section before moving to the next whenever the layout allows it.
Apply Progression Upgrades
Use available tool improvements and abilities when repeated travel or large groups of targets begin slowing progress. Automatic pickup and placement can support a smoother collection loop.
Run a Final Search
Compare your progress with the 10,000-nail objective. Return to difficult areas, inspect missed sightlines, and continue until the remaining gap is resolved.
| Stage | Main Action | Completion Check |
|---|---|---|
| Opening | Learn movement and hammering | The interaction registers consistently |
| First pass | Search visible targets | Each discovered nail is completed |
| Expansion | Explore accessible sections | No obvious area is left unchecked |
| Upgrade phase | Improve the collection loop | Travel and repeated actions become easier |
| Cleanup | Revisit missed locations | The remaining total continues to decrease |
Do not assume that picking up a nail completes it. Confirm the hammering action separately, especially when reviewing your progress near the end of a run.
Upgrades, Abilities, and Efficiency
The progression system exists to make a large collection goal more manageable. Instead of treating every upgrade as equally urgent, choose improvements according to the problem slowing you down: movement, pickup, placement, or processing several nearby targets.
Steam materials specifically identify automatic pickup and placement and Chain Lightning among the game’s progression abilities. Exact costs and numerical effects can change with updates, so use the current in-game descriptions when making purchases.
| Upgrade Category | Practical Benefit | When to Prioritize |
|---|---|---|
| Tool upgrades | Improve the efficiency of the main nail-handling loop | When basic actions feel slow |
| Automatic pickup | Reduces repeated manual collection actions | When targets are spread across active routes |
| Automatic placement | Helps streamline the transition from pickup to completion | When handling many targets in sequence |
| Chain Lightning | Supports multi-target efficiency in suitable situations | When groups of nails create repeated work |
| Movement utility | Reduces time spent crossing cleared areas | During late-game cleanup and revisits |
Pickup Efficiency
Choose collection-focused improvements when stopping to gather every target becomes the main source of delay.
Placement Flow
Streamline the movement between collecting and completing nails so fewer actions interrupt exploration.
Chain Lightning
Use the ability where multiple targets can benefit from a chained approach. It is most valuable when grouped work replaces repeated single-target actions.
Late-Game Utility
Save some attention for upgrades that reduce backtracking. Their value becomes clearer when only scattered targets remain.
A practical upgrade order is:
- Improve the action that currently consumes the most time.
- Select collection or placement support when handling groups of targets.
- Revisit earlier spaces after unlocking a new ability.
- Use Chain Lightning where its multi-target function fits the area.
- Keep movement efficiency in mind during final cleanup.
The best improvement is usually the one that removes your current bottleneck. If travel is slow, favor mobility; if repeated collection is slow, favor pickup or placement support.
Doors, Hidden Areas, and Nail Locations
Doors are part of the game’s exploration progression. Some access points require sufficient nail progress before they open, which means exploration and completion are connected rather than separate systems. When a door becomes available, treat the newly opened space as a fresh search zone.
Because exact room totals and fixed location lists should be verified against the current game version, use an area-based tracking method instead of relying on memory alone.
| Location Type | Search Pattern | Revisit Trigger |
|---|---|---|
| Starting area | Sweep the perimeter, then inspect central objects | A later ability changes access |
| Standard rooms | Search entrance to far side in a fixed direction | Progress total stops increasing |
| Outdoor sections | Check edges, structures, and unusual sightlines | A door or route opens |
| Hidden rooms | Inspect doors and restricted paths after progress milestones | A new ability becomes available |
| Difficult corners | Adjust viewpoint and approach from another angle | Final cleanup begins |
Nail Location Review:
- Search every accessible area before moving to a new route
- Check corners, edges, elevated surfaces, and partially blocked objects
- Record areas that require a later return
- Revisit spaces after unlocking doors or abilities
- Compare completed progress with the 10,000-nail objective
When a door opens, do not only walk through and leave. Search the new area immediately, then note whether nearby spaces may now be reachable from a different angle. This keeps the walkthrough organized and limits repeated exploration.
After opening a new area, clear its visible targets before returning to older locations. Mark difficult sections for a dedicated cleanup pass instead of repeatedly interrupting the main route.
Final Cleanup and Completion Strategy
The last portion of the game is less about speed and more about consistency. Missing nails are often associated with limited visibility, awkward approach angles, crowded scenery, or spaces that were searched before an upgrade changed access.
Use a fixed cleanup route. Start with the earliest area, move through each previously tracked section, and inspect every location that was rushed or visually unclear. Changing the camera and moving closer can reveal targets that were easy to overlook during normal progression.
| Cleanup Pass | Focus | Recommended Action |
|---|---|---|
| Pass 1 | Rushed sections | Repeat the original route at a slower pace |
| Pass 2 | Limited visibility | Change viewpoint and inspect behind foreground objects |
| Pass 3 | Newly accessible areas | Search spaces affected by doors or abilities |
| Pass 4 | Scattered targets | Prioritize locations with incomplete progress |
| Pass 5 | Final verification | Complete the last nail and wait for the completion response |
Public patch information for 2026 records a fix for a crash that could occur when completing the last nail. Keep the game updated and allow the completion response to finish before closing the session.
For a reliable finish:
- Use the same route during every cleanup pass.
- Inspect high, low, left, and right sightlines.
- Approach suspicious objects from more than one direction.
- Recheck areas affected by newly unlocked abilities.
- Confirm that the final completion state is retained.
The goal is not only to see every nail, but to finish the required hammering action and verify that the game has registered the result.
Q: What is the main goal in Hammer these nails?
The central objective is to locate and complete 10,000 nails. Progress depends on finding targets, picking them up, and finishing the hammering action.
Q: Should I collect every nail immediately?
Complete visible nails during the first search whenever practical. Separating completed targets from unfinished targets makes the final cleanup much easier.
Q: Which upgrades should beginners prioritize?
Prioritize the upgrade category that addresses your current bottleneck. Collection and placement support help with repeated actions, while movement utility helps during long routes and late-game revisits.
Q: How do I find the last few nails?
Use a consistent area-by-area cleanup route. Recheck corners, edges, blocked sightlines, newly accessible spaces, and locations that were searched quickly during the first pass.
A structured route is more valuable than random searching. Complete visible targets, record difficult areas, revisit after upgrades, and verify the final completion state.