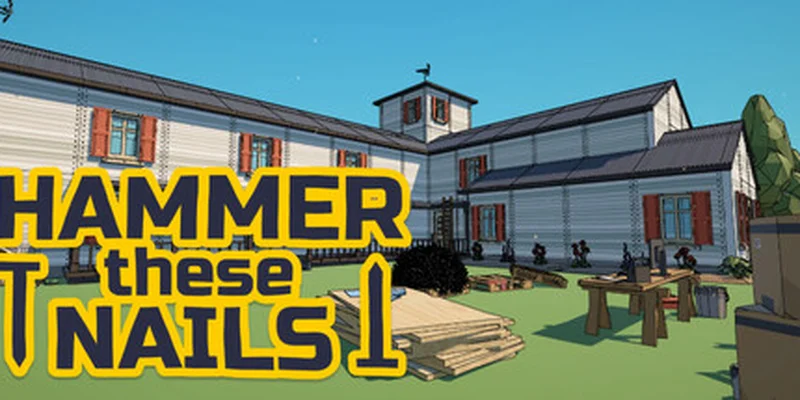
- Hammer these nails how to play starts with picking up, placing, and hammering nails.
- Left click picks up nails and swings the hammer; right click places objects.
- Selection radius and reach improve how many nearby nails you can handle.
- Nail handling speed shortens the time required to place nails into slots.
- Small objects and fences provide reliable early money for useful upgrades.
Hammer these nails how to play: Core Controls
Hammer these nails how to play is built around a simple repair loop: find loose nails, collect them, place them into nearby slots, and hammer them into the environment. The game gradually turns this basic interaction into a progression system with money, upgrades, automatic tools, hidden areas, ducks, ladders, and increasingly large repair jobs.
The opening minutes are intentionally straightforward. Walk toward a nail pile, use left click to pick up nails, use right click to place them into available slots, then use left click again to hammer. You can hold the hammer button during some tasks, which makes repeated repairs faster than clicking each nail separately.
Video Highlights:
- Basic pickup, placement, and hammering controls
- Early money from chairs, fences, furniture, and small objects
- Upgrade choices involving radius, reach, strength, and handling speed
- Automatic tools such as the vacuum, dispenser, and lightning
- A late-game route through the house, roof, fence, and remaining repair points
| Action | Control | Purpose |
|---|---|---|
| Pick up nails | Left click | Collect loose nails from the environment |
| Place nails | Right click | Put nails into nearby repair slots |
| Hammer | Left click | Drive placed nails into the target |
| Run | Shift | Move more quickly after unlocking the ability |
| Jump | Space | Use vertical routes after unlocking the helmet |
| Ability use | Number keys | Activate tools such as vacuum, dispenser, or lightning |
The main challenge is not understanding the controls. It is deciding where to spend limited money and when to leave a large repair target for later. A fence or roof section may contain many nails, while a chair or small sign can provide a quicker return with less effort.
Use the hammer continuously when several nails are already placed. Holding the attack input reduces unnecessary pauses during dense repair sections.
Collect
Find loose nails and bring them into your inventory. Early upgrades can increase the number collected per pickup.
Place
Put nails into visible slots with the placement input. Handling speed becomes more valuable as repair areas grow.
Hammer
Strike placed nails to complete the object and receive money when the target is eligible for a reward.
Explore
Check ladders, roof sections, doors, and side areas for additional repair points, ducks, and upgrade opportunities.
The Best Early Progression Route
The strongest opening strategy is to avoid spending all your time on the largest object in sight. Instead, use small, accessible repair points to build your first cash reserve. Chairs, signs, small furniture, selected fence sections, and other compact objects are easier to finish while your reach and nail handling are still limited.
Money rewards are tied to completing eligible repair targets, but object size is not always a reliable indicator of income. A large fence section can require far more nails without producing a proportionally larger payment. Treat large objects as progression goals rather than automatic money multipliers.
| Repair target | Early value | Main issue | Recommended timing |
|---|---|---|---|
| Small furniture | Quick cash | May require walking between slots | First priority |
| Chairs and signs | Low-risk repairs | Some slots are easy to miss | Early game |
| Door sections | Moderate progress | Larger nail requirements | After radius upgrades |
| Fence panels | Strong cash route later | Wide coverage and many nails | Mid game |
| Roof and upper areas | High progression value | Requires better movement and reach | After ladders or jump access |
Follow this order when starting a fresh run:
Collect Nearby Nails
Start with the closest loose nail piles and repair points. Do not travel across the entire area before improving your basic collection ability.
Finish Small Objects
Repair chairs, signs, small furniture, and other compact targets. These jobs teach the slot system while generating the first upgrade money.
Buy Collection Improvements
Prioritize selection radius, additional nails per pickup, or similar collection upgrades. These reduce the time spent walking between loose nails and repair slots.
Expand Toward the House
Move to doors, windows, wall panels, and the dog house after your reach improves. Use the ladder when upper repair points become accessible.
Return for Large Repairs
Complete the fence and roof after your collection, reach, speed, and strength upgrades make the larger nail groups manageable.
The route is flexible, but the principle remains consistent: earn money from manageable repairs, improve the tools that remove movement and interaction delays, then tackle wide repair zones. This approach also helps reveal nails that are easy to overlook.
If an upgrade lets you collect or affect more nails with each interaction, it usually improves both your income speed and your ability to clear large repair targets.
Upgrade Priorities and Ability Choices
The upgrade menu is the main source of long-term progression. Several improvements serve different stages of a run, so the best choice depends on whether you are still collecting scattered nails or already placing hundreds of nails around the house.
Selection radius and reach are especially useful early. A larger selection radius lets the hammer affect nails from farther away, while reach helps you interact with repair points without standing directly beside every slot. These upgrades become more noticeable when working on fences, windows, roofs, and large wall sections.
| Upgrade type | What it improves | Best use |
|---|---|---|
| Selection radius | Effective area around the hammer or interaction point | Dense nail clusters and fence panels |
| Reach | Distance from which targets can be affected | Doors, walls, roofs, and awkward positions |
| Nail handling speed | Speed of collecting or placing nails | All stages, especially large repairs |
| Extra nails | Nails collected per pickup | Reducing trips between piles and slots |
| Strength | Hammer impact and damage potential | Later progression and powerful effects |
| Vision | Finding remaining or hidden nails | Cleanup and completion checks |
| Lightning | Strikes nearby nails or adds area assistance | Dense groups after placement begins |
| Vacuum | Automatically gathers nails over time | When loose nails remain across the area |
| Dispenser | Automatically places nails into nearby slots | When many repair slots are available |
A practical purchase order is selection radius, reach, and nail handling speed, followed by extra nails and strength. The vacuum and dispenser are valuable once the environment has enough loose nails and slots to keep them active. Buying automation too early may feel less useful if there are not yet enough targets nearby.
Lightning becomes more effective after nails have already been placed across a dense area. It can help clear nearby targets, but it should support your route rather than replace direct hammering. Vision is most useful when the repair count seems incomplete and you cannot immediately find the missing nail.
Do not buy an expensive upgrade simply because it is available. Compare it with the time saved by reach, radius, handling speed, or additional nail capacity.
| Situation | Recommended upgrade | Reason |
|---|---|---|
| Nails are scattered | Selection radius | Collect and affect nearby nails more efficiently |
| Slots are far apart | Reach | Reduce repositioning between interactions |
| Placement feels slow | Nail handling speed | Shorten repeated placement actions |
| Trips take too long | Extra nails | Carry more nails per collection cycle |
| Large targets resist progress | Strength | Improve hammer performance and related effects |
| Final nail is difficult to locate | Vision | Reveal overlooked nails during cleanup |
Large Repairs, Exploration, and Cleanup
Once the first upgrades are active, expand beyond the smallest objects. The house, doors, dog house, windows, fence panels, roof, and upper sections become the main progression route. Large repair areas often have nails on multiple sides, so completing the visible front does not always finish the target.
The fence is particularly useful after reach and handling speed have improved. It contains many repair points and can produce repeated income, but it is inefficient when approached too early. Work across one panel at a time, then sweep the same area again to identify missed slots before moving farther away.
The house and roof also reward a systematic route. Use ladders to access elevated locations, check both sides of visible structures, and avoid assuming that a partially completed object is finished. A single overlooked nail can keep a section active.
| Area | What to check | Efficient approach |
|---|---|---|
| House exterior | Wall panels, doors, windows | Sweep from ground level upward |
| Dog house | Front, sides, and rear slots | Check the backside after the visible face |
| Fence | Multiple panels and upper sections | Finish one panel before moving on |
| Roof | Upper surfaces and scattered slots | Use ladders and improved reach |
| Door areas | Frame, panels, and nearby repairs | Complete smaller sections before the main door |
| Neighborhood | Ducks, transport, and side paths | Explore during low-resource travel periods |
The game also includes exploration elements that are easy to miss while focusing on nails. Ducks appear around the environment and can be found during regular movement. Ladders open vertical routes, while running and jumping abilities improve navigation later in the run.
Repair and Exploration Checklist:
- Finish nearby small objects before starting a large fence section
- Check both the front and back of structures
- Use ladders to inspect upper windows and roof areas
- Sweep completed panels for missed nails
- Search the neighborhood for ducks and overlooked repair points
When a section appears unfinished, circle the object slowly instead of repeatedly striking the same visible area. Missed nails are often located on another side or above the current viewpoint.
Completion Strategy and FAQ
A full run focuses on more than simply placing nails. You need to manage money, unlock useful abilities, revisit earlier areas, and inspect the environment for remaining repair points. The final stretch can include a large number of nails, so automation, reach, radius, and handling speed make a noticeable difference.
A recorded completion run reached the final nail after roughly 1 hour and 9 minutes, including extensive upgrades and exploration. Treat that time as a practical reference rather than a fixed requirement. Your route, upgrade order, and willingness to search for every side repair can change the result.
| Completion goal | Suggested method | Check before moving on |
|---|---|---|
| Earn early money | Repair compact objects first | Confirm the reward was received |
| Clear the house | Work from ground level upward | Inspect windows, doors, and wall panels |
| Finish the fence | Upgrade reach and handling speed | Sweep each panel twice |
| Complete the roof | Use ladders and strong reach | Search upper surfaces and edges |
| Find remaining nails | Activate vision and inspect sides | Check inventory and repair counters |
| Finish the run | Use automation and final cleanup | Confirm no repair points remain |
Q: What are the basic controls in Hammer these nails?
Use left click to pick up nails and hammer placed nails. Use right click to place nails into available slots. Shift can be used for running after the ability is unlocked, and Space supports jumping after the related progression unlock.
Q: What should I upgrade first?
Selection radius, reach, and nail handling speed are strong early priorities. They reduce walking and interaction delays, making both small repairs and later fence or roof sections easier to clear.
Q: Do large objects always pay more money?
Not necessarily. Large targets can require many more nails without providing a proportionally larger reward. Small furniture, chairs, signs, and manageable fence sections can be more efficient early sources of money.
Q: How do I find the last missing nail?
Use vision if available, circle the entire repair target, and inspect its back, upper surfaces, and side panels. A section may remain incomplete because one nail is hidden outside the most obvious viewpoint.
Save the last cleanup pass for when your reach, vision, and automation are developed. Revisiting every area with stronger tools is usually faster than searching carefully with starting abilities.
The most reliable way to approach Hammer these nails is to treat every upgrade as a time-saving tool. Start small, build cash, expand your interaction range, and then return to the largest structures. With a deliberate route, the game’s repetitive repair loop becomes a steady progression system rather than a series of disconnected nail piles.