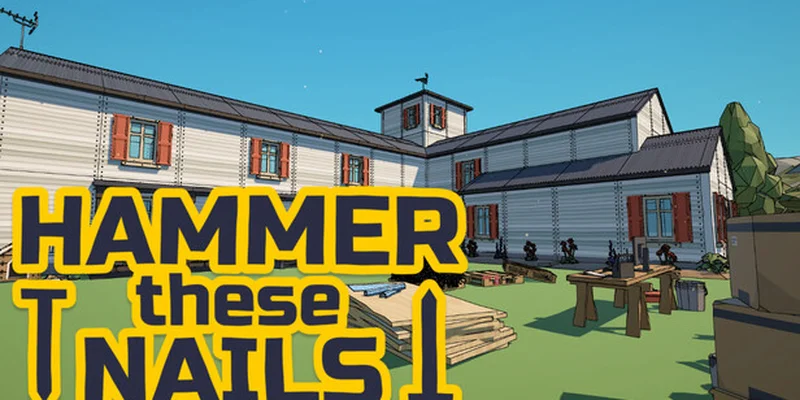
- Hammer these nails secret room access requires roughly 5,000 hammered nails.
- Upgrade handling speed and reach before committing to large fence sections.
- Use small objects such as lights, vents, sticky notes, and furniture for efficient cash.
- Collect all 10 ducks to activate the final mysterious door after reaching the upper area.
- Unlock jumping and climbing access before attempting the roof and highest wall sections.
Hammer these nails Secret Room Overview
The secret room route in Hammer these nails is tied to overall nail progress rather than a conventional key quest. You must build enough momentum, improve your hammer abilities, and reach the locked threshold that opens the unusual house route. The most reliable target is 5,000 hammered nails, which unlocks access to the upper section where the secret-room progression continues.
The area is designed around exploration. Several objects provide money when fully nailed, while others reveal ducks, movement upgrades, or access routes. Small targets are especially valuable early because they require fewer nails and let you purchase the upgrades that make large walls and fences manageable.
Video Highlights:
- The nail counter reaches the major 5,000-nail unlock.
- Movement upgrades reveal the upper house and roof route.
- Hidden ducks help complete the final mysterious-door objective.
- Small objects provide a faster early-game cash route than fences.
| Progress Point | What It Unlocks | Recommended Response |
|---|---|---|
| Early nail count | Basic cash and first upgrades | Target lights, vents, notes, and small fixtures |
| Around 200 nails | Access to an additional locked route | Check the newly available house section |
| Around 5,000 nails | Upper-area access | Search upstairs and continue toward the roof |
| 10 ducks found | Final mysterious-door interaction | Return to the large door and inspect the opening |
Do not begin with the longest fence section unless nearby upgrades are already affordable. A loop through small objects usually produces faster early progress and makes later construction much smoother.
Small Targets
Lights, vents, sticky notes, and small fixtures need fewer nails and provide efficient early cash.
Large Structures
Fences, walls, roofs, and porch sections contain many nail points but become manageable after upgrades.
Exploration Objects
Ducks, doors, trampolines, and movement upgrades reveal the path toward the secret room.
Best Early Nail-Farming Route
The early objective is to turn a slow manual hammering loop into a steady upgrade cycle. Your first purchases should improve how quickly you collect, place, and hit nails. The transcript demonstrates that selection radius, handling speed, reach, and automatic placement have more practical value than spending every dollar on raw strength immediately.
Begin by circling the house and checking every small object. Lights are particularly attractive because they can contain very few nail points. Vents, sticky notes, benches, chairs, signs, and small house fixtures are also worth checking before you attack a full wall. These targets reduce travel time and allow you to buy upgrades with less grinding.
| Target Type | Early Value | Why It Helps |
|---|---|---|
| Lights | High | Often require only a small number of nail points |
| Vents | High | Compact targets with convenient placement positions |
| Sticky notes | High | Easy cash when discovered during house loops |
| Benches and chairs | Medium | Several nearby objects can be completed together |
| Fences | Medium | Reliable progress but inefficient before range upgrades |
| Large walls | Low early | Too many nail points for an unupgraded hammer |
Collect the Starting Nails
Pick up a useful supply before beginning a construction loop. Keep the nail box stocked so you are not repeatedly interrupting the route to gather individual nails.
Clear Compact Objects
Search for lights, vents, notes, signs, benches, chairs, and other small fixtures. Finish nearby objects together so your hammer and lightning effects can cover several nail points.
Buy Handling Upgrades
Prioritize nail selection radius, extra pickup capacity, handling speed, and automatic placement. These upgrades improve both collection and construction efficiency.
Revisit the House
Return to the main house after each upgrade purchase. A larger selection radius often reveals nail points that were previously awkward or hidden behind furniture.
Use Large Structures Later
Once reach, range, and placement speed are improved, begin clearing porch sections, walls, roofs, and fences in organized passes.
A practical early order is selection radius, extra nail pickup, handling speed, automatic placement, reach, and then strength or lightning improvements. The exact cost curve can vary during play, but faster nail movement benefits nearly every target.
| Upgrade Focus | Main Benefit | Best Use |
|---|---|---|
| Selection radius | Collects nearby nails more easily | Dense areas around walls and fixtures |
| Extra pickup | Holds more nails at once | Long loops with limited interruptions |
| Handling speed | Places nails faster | Large walls, roofs, and fences |
| Dispenser | Automatically places nails in nearby slots | Clustered construction points |
| Reach | Hits farther nail points | Roof edges and broad wall sections |
| Lightning | Chains hits through nearby nails | Dense groups prepared in advance |
Ability Management for Walls and Fences
Abilities become more useful when you prepare the area before activating them. The lightning ability can chain through nearby nails, making it strongest against dense groups rather than isolated targets. The automatic nail-placement ability is similarly useful when many empty slots are clustered around the same construction object.
Use the dispenser or automatic placement ability first, then position yourself so the largest possible group is within hammer range. Activate lightning only after enough nail points are visible. This avoids wasting its limited duration while walking between separated objects.
Selection Radius
The safest first improvement for collecting scattered nails and reducing empty-handed travel.
Handling Speed
Makes repeated placement and hammer actions feel faster, especially on walls and fences.
Reach
Helps connect distant nail points along roofs, railings, and broad exterior surfaces.
Lightning
Best for prepared clusters where several nails are close enough to chain together.
| Situation | Recommended Ability | Positioning Advice |
|---|---|---|
| Dense wall section | Lightning | Stand near the center of the visible nail cluster |
| Long fence row | Automatic placement | Walk slowly along the row after loading nearby slots |
| Roof edge | Reach | Aim from below or from the nearest accessible platform |
| Scattered fixtures | Selection radius | Sweep the area before spending an active ability |
| Final cleanup | Manual hammering | Check for isolated nail points missed by chained effects |
Lightning does not replace exploration. If nail points are spread across several walls or hidden above you, activate it only after choosing a compact target area and loading the nearby slots.
The fence can look like the fastest way to raise the nail counter because it contains many visible points. However, it may also send automatic nails toward sections you cannot yet reach. This creates the impression that progress has stopped when the remaining targets are actually on higher walls or the roof.
For that reason, treat the fence as a mid-game construction route. Work from the lowest rows upward, pause to inspect missed points, and use the vision-style upgrade when available. Red or otherwise highlighted sections can help identify unfinished areas and prevent repeated work on already completed surfaces.
Clear the bottom rows first, then the middle, then the upper sections. This makes missed nail points easier to identify and limits the chance of spending abilities on targets outside your current movement range.
Secret Room Access and Hidden Ducks
The secret-room sequence becomes clearer after the major nail threshold is reached. Around 5,000 hammered nails, a previously locked route opens into an upper section. This area contains movement-related discoveries, additional ducks, and the path toward the roof.
Jumping is important because some nail points and collectibles sit above normal walking height. The upper area also changes how you should search: instead of looking only around the ground-level house, inspect platforms, roof edges, elevated structures, and spaces behind newly opened doors.
| Exploration Stage | Main Search Area | Key Objective |
|---|---|---|
| Ground level | Yard and house perimeter | Clear small objects and locate early ducks |
| Interior route | Newly accessible house sections | Check doors, walls, and hidden corners |
| Upper area | Upstairs platforms and ledges | Find additional ducks and movement upgrades |
| Roof route | Roof surfaces and high walls | Finish elevated nail points |
| Final collection | Entire property | Confirm all 10 ducks are active |
Secret Room Progress Checklist:
- Reach approximately 5,000 hammered nails
- Open the route into the upper area
- Unlock jumping and inspect elevated platforms
- Search the roof and upper walls for missing ducks
- Collect all 10 ducks before using the final mysterious door
The hidden ducks are spread across the property rather than placed in one room. If the final door does not respond, continue checking the upper house, roof, pool area, yard objects, and narrow spaces near construction targets.
Once all ten ducks are active, return to the large mysterious door. The final interaction is intentionally strange and uses a single large nail as part of the opening sequence. Keep the door area accessible until the duck count is complete, then inspect the interaction point again.
The roof should be treated as the final construction layer rather than the starting location. The jump and trampoline-style movement options make it easier to reach elevated points, while increased reach reduces the amount of repositioning required. If several nail slots remain above you, do not assume the wall is bugged; you may simply lack the movement or range needed to reach them.
Before returning to the mysterious door, verify the nail milestone, the upper-area unlock, the movement upgrade, and the full 10-duck collection. These checks cover the main progression gates described by the route.
Final Route, Cleanup, and FAQ
The most reliable completion route is a progression loop: farm small objects, purchase handling upgrades, clear dense construction groups, unlock the upper section, collect ducks, finish the roof, and then revisit the mysterious door. This approach avoids spending too much time on inaccessible nail points and keeps every upgrade tied to a visible improvement.
Use the final cleanup pass to search for isolated lights, sticky notes, patio furniture, signs, vents, and unfinished lower wall sections. Small objects can be easy to overlook because they blend into the property, but they may still count toward your money, nail total, or completion progress.
| Cleanup Pass | Check These Areas | Common Oversight |
|---|---|---|
| First pass | Yard and front exterior | Small lights and signs |
| Second pass | Porch and side walls | Furniture and narrow wall sections |
| Third pass | Interior and upper route | Doors, corners, and elevated points |
| Fourth pass | Roof and rear exterior | High nail rows and hidden ducks |
| Final pass | Mysterious door area | Missing duck activation or interaction |
If the door does not open, return to exploration instead of repeatedly interacting with it. Missing ducks, inaccessible roof points, or an incomplete nail milestone are more likely explanations than a failed interaction.
Q: How do I reach the Hammer these nails secret room?
Work toward approximately 5,000 hammered nails, open the upper route, unlock the movement options, and continue searching the elevated house and roof areas. The final mysterious door is connected to the broader exploration route.
Q: What should I upgrade first?
Prioritize selection radius, extra nail pickup, handling speed, automatic placement, and reach. Strength and lightning become more valuable after you can efficiently collect and position nails.
Q: Are fences the best way to earn money early?
Not usually. Fences contain many nail points, but compact targets such as lights, vents, sticky notes, signs, and furniture often provide a faster early route.
Q: How many ducks are needed for the final door?
The route requires all 10 hidden ducks to be active before the final mysterious-door interaction can be completed.
The key lesson is to treat the property as a connected puzzle rather than one giant construction job. Every upgrade improves the next loop, and every movement unlock reveals more nail points or collectibles. With a small-target opening route and a careful high-to-low cleanup strategy, the secret-room path becomes much easier to track in 2026.