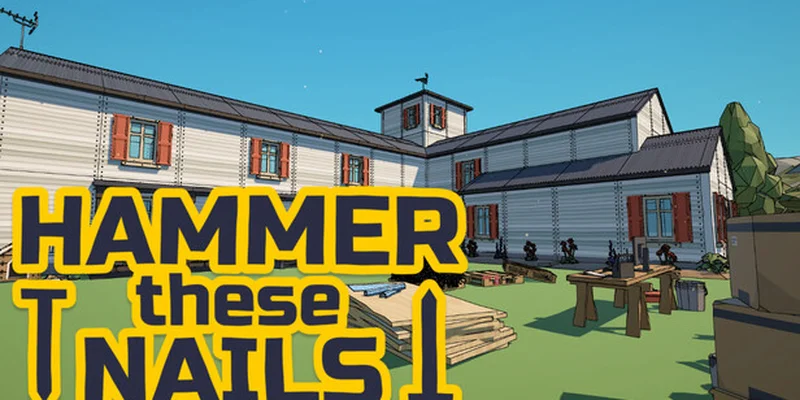
- Hammer these nails achievements include nail milestones, duck collection, upgrades, movement challenges, and a speedrun.
- Start with small objects because quick completions provide money for early upgrades.
- Prioritize the dispenser and lightning to automate nail placement and accelerate large sections.
- Use sprint and jump to reach upper areas, roof sections, hidden ducks, and jump pads.
- Save the vision upgrade for the final cleanup when missing nails are difficult to locate.
Hammer these nails achievements: What to Track
Hammer these nails achievements are built around several overlapping goals rather than a single linear objective. You must repair the structure, improve your hammering tools, explore the entire property, locate hidden ducks, and complete a timed run. The most reliable approach is to treat the game as two separate routes: a relaxed completion run and a carefully optimized speedrun.
The central progression loop is straightforward. Pick up nails, place them into visible slots, hammer completed groups, earn money, and buy upgrades. The challenge comes from deciding which objects deserve your limited nails and time. Large structures can consume hundreds of nails while paying slowly, whereas chairs, signs, lights, pallets, and similar compact objects can produce faster returns.
Video Highlights:
- The game tracks progress toward 10,000 hammered nails.
- Hidden ducks are placed across the property and require exploration.
- Movement upgrades open roof routes and previously difficult areas.
- The speedrun requires finishing the full task in under one hour.
- Special abilities can automate nail placement and chain lightning across nearby nails.
| Achievement Goal | What You Need to Do | Best Timing |
|---|---|---|
| Nail milestone | Hammer progressively larger totals, including the 10,000-nail target | Earn naturally during the main run |
| Duck collection | Find every hidden duck around the property | Explore after movement upgrades |
| All upgrades | Purchase and improve the available stats and abilities | Spend money throughout progression |
| Jump-pad objective | Use each jump pad discovered in the map | Finish after unlocking jump access |
| Speedrun | Complete the full repair route in under one hour | Attempt as a dedicated optimized run |
Do not chase every achievement during your first relaxed playthrough. Learn the property layout, identify small high-value objects, and reserve the timed attempt for a route you already understand.
Nail Milestones
Build progress by hammering groups of nails into objects. Large milestones arrive naturally once automation is unlocked.
Hidden Ducks
Search rooms, roof areas, outdoor spaces, and corners after obtaining sprint and jump access.
Upgrade Goals
Maximize stats and special abilities as money becomes available. Several upgrades improve one another.
Timed Completion
Finish the full repair objective in less than one hour. Efficiency matters more than exploration during this run.
Efficient Progression Route
The most efficient progression route begins with compact objects and expands toward larger sections only after your hammer strength and nail handling improve. Small objects are valuable because they require fewer nails, complete quickly, and provide money that can be reinvested into upgrades.
Look for objects where several nail slots can be reached from one position. Chairs and compact outdoor items are especially useful because you can often target multiple slots at once. Pallets, signs, lights, and small structural pieces also help build early income without forcing long walks around the property.
| Object Type | Early Value | Main Advantage | Recommended Use |
|---|---|---|---|
| Lights and signs | Very high | Few nails per completion | Start here for quick money |
| Chairs | High | Multiple nearby slots | Farm when available |
| Pallets | High | Compact placement area | Good early income source |
| Tables and small sets | Medium | Several connected pieces | Use after basic upgrades |
| Dog house | Low early | Many angles and hard-to-reach slots | Delay until reach improves |
| Large siding sections | Low early | High nail requirement | Save for automation |
Collect a Manageable Nail Supply
Gather enough nails for a short sequence rather than filling every visible slot immediately. A smaller supply keeps the route flexible and prevents you from wasting time on awkward objects.
Complete Compact Objects
Target lights, signs, chairs, pallets, and other pieces with low nail requirements. Stand where the hammer radius can cover several slots at once.
Buy Early Efficiency Upgrades
Improve hammer strength, selection radius, and nail handling speed. These upgrades reduce repeated clicks and let you complete compact objects more quickly.
Unlock Automation
Purchase the nail dispenser and the automatic nail pickup ability when possible. These tools become increasingly valuable as the number of empty slots grows.
Move Into Large Structures
Once your abilities are active, work through the porch, siding, windows, roof, and other large sections in batches instead of repairing isolated slots.
A useful rule is to place nails in batches, then activate an ability only when several nearby objects are ready. Chain lightning becomes more effective when multiple nails are available, while the dispenser is strongest when the surrounding structure contains many empty slots.
The dispenser is a major turning point because it places nails from your hand into adjacent slots automatically. Pair it with stronger hammers and faster nail handling for a smoother midgame.
Upgrade Priorities and Ability Synergy
The upgrade shop contains both permanent stat improvements and active abilities. The strongest setup combines faster collection, wider interaction ranges, stronger hammer hits, and automation. Buying only one category can leave a weakness elsewhere: high hammer strength does not solve slow collection, while a large selection radius has limited value if every nail still requires several hits.
| Upgrade Area | Effect | Priority | Why It Matters |
|---|---|---|---|
| Hammer strength | Reduces hits needed per nail | High | Speeds every repair action |
| Selection radius | Targets more nearby nails | High | Improves value from each hammer action |
| Interaction range | Reaches distant slots and pickups | High | Reduces repositioning |
| Nail handling speed | Shortens pickup and placement delays | High | Supports rapid object clearing |
| Extra nails per pickup | Increases supply from each collection | Medium-High | Keeps automation running longer |
| Automatic nail pickup | Pulls nails toward you over time | High | Reduces trips to the nail pile |
| Dispenser | Places held nails into adjacent slots | Very High | Automates repetitive placement |
| Chain lightning | Jumps from one nail to nearby nails | High | Clears dense groups quickly |
| Vision | Reveals missing nail locations | Medium | Best for final cleanup |
| Sprint and jump | Improves movement and vertical access | Medium-High | Opens roof routes and hidden areas |
Use active abilities deliberately. Automatic pickup is useful while you work through a structure, but it does not replace the need to plan where nails are placed. Chain lightning should be saved for dense clusters rather than used on a single isolated nail. The dispenser is strongest when the structure has many adjacent empty slots.
Collection Build
Combine automatic pickup with extra nails per pickup. This reduces interruptions when working through the porch, roof, or siding.
Hammer Build
Combine strength, selection radius, and interaction range. This is the most direct way to increase output per action.
Cleanup Build
Use vision, wider range, and movement upgrades near the end. This setup helps identify and reach the last missing slots.
Do not spend every early dollar on movement or temporary range. Strength, nail handling speed, automation, and selection radius usually provide more immediate value during repairs.
Duck Hunting, Movement, and Final Cleanup
Exploration becomes easier after unlocking sprint and jump. Several ducks are placed in locations that are easy to overlook from ground level, including interior areas, roof routes, upper ledges, and outdoor corners. Search systematically instead of repeatedly circling the same section.
The property also contains movement-related objectives. Jump pads may be placed near outdoor structures, clothing lines, or elevated routes. If you are pursuing every achievement, use each pad deliberately and record which areas have already been checked.
| Search Area | What to Check | Helpful Upgrade |
|---|---|---|
| Main house | Rooms, windows, stairs, and upper openings | Jump |
| Roof and upper ledges | Roofline, elevated corners, and access points | Jump and interaction range |
| Outdoor seating area | Chairs, tables, pallets, and nearby corners | Selection radius |
| Side and rear sections | Fences, siding, trees, and narrow angles | Sprint and range |
| Jump-pad route | Trampolines and other launch surfaces | Jump |
| Final repair zone | Large nail groups and hidden slots | Vision |
Achievement Cleanup Checklist:
- Reach the 10,000 hammered-nail milestone
- Find every hidden duck on the property
- Purchase and upgrade the available stats and abilities
- Use every jump pad discovered during exploration
- Use vision to locate remaining missing nails
For the final cleanup, activate the vision ability when the structure appears finished but the completion state has not triggered. The ability briefly helps reveal gaps that can be hidden behind clothing, trees, roof edges, or unusual camera angles. Check both sides of large structures before assuming an object is complete.
The last nail is treated as a distinct finishing moment. Leave a small supply available if you are close to completing the property, then inspect the final marked area instead of spending every nail on optional repairs.
Divide the map into zones and clear one zone at a time. Mark the main house, roof, front area, rear area, and side structures separately so hidden ducks and missed nails do not blend into one large search.
Under-One-Hour Speedrun Strategy
The speedrun is the most demanding of the Hammer these nails achievements because it combines route planning, upgrade choices, movement, collection speed, and repair efficiency. A relaxed completion can take substantially longer, so do not simply repeat the same route faster. The timed route must intentionally skip low-value work until your build can handle it efficiently.
Start with objects that require only one to four nails. Lights and signs are strong opening targets because they provide quick completions with minimal walking. Chairs and compact items are also useful when they appear near one another. Delay large structures, walls, and complicated objects until your hammer strength and automation can reduce their time cost.
| Speedrun Phase | Main Objective | Upgrade Focus |
|---|---|---|
| Opening minutes | Finish one-to-four-nail objects | Strength, selection radius |
| Early income | Chain small objects near one another | Nail handling speed |
| Mid-run | Unlock automation and lightning | Dispenser, automatic pickup |
| Large repairs | Clear structures in batches | Range, extra nails per pickup |
| Final cleanup | Locate gaps and finish remaining sections | Vision, jump, sprint |
| End condition | Confirm completion before the timer expires | No unnecessary detours |
A practical speedrun order is:
- Clear nearby lights, signs, and other tiny objects.
- Farm chairs, pallets, and compact groups for early money.
- Buy strength and handling improvements before expensive exploration tools.
- Unlock automatic pickup, chain lightning, and the dispenser.
- Use the dispenser while moving through large connected structures.
- Purchase sprint and jump when they unlock faster routes or upper areas.
- Reserve vision for the final missing-nail search.
- Avoid optional exploration until the repair route is secure.
The fastest route is not the route with the fewest objects. It is the route that produces money quickly, unlocks automation early, and keeps you working near several repair targets at once.
The source run reached the full completion state in about one hour and forty-three minutes before attempting the optimized route. Its successful speedrun finished with only a small amount of time remaining, showing why early object selection and upgrade order matter. Treat the first run as a scouting session, then improve the route by removing backtracking and delaying inefficient repairs.
FAQ: Hammer these nails achievements
Q: What are the main Hammer these nails achievements?
The achievement route centers on hammering large nail totals, finding every hidden duck, upgrading the available stats and abilities, using the jump pads, completing the final repair objective, and finishing the game in under one hour.
Q: Which upgrades should I buy first?
Start with hammer strength, selection radius, nail handling speed, and interaction range. Then prioritize automatic pickup, chain lightning, and the dispenser as soon as your income allows.
Q: What should I repair first during a speedrun?
Begin with lights, signs, chairs, pallets, and other small objects that use only a few nails. They complete quickly and provide money for upgrades before you tackle large structures.
Q: When should I use the vision ability?
Use vision near the end of a completion run or speedrun. It is most useful when the property looks finished but hidden gaps remain behind structures, trees, clothing, roof edges, or distant angles.
Use the first playthrough to learn object locations and movement routes. On the achievement run, prioritize compact repairs, automation, dense nail groups, and a deliberate final search.