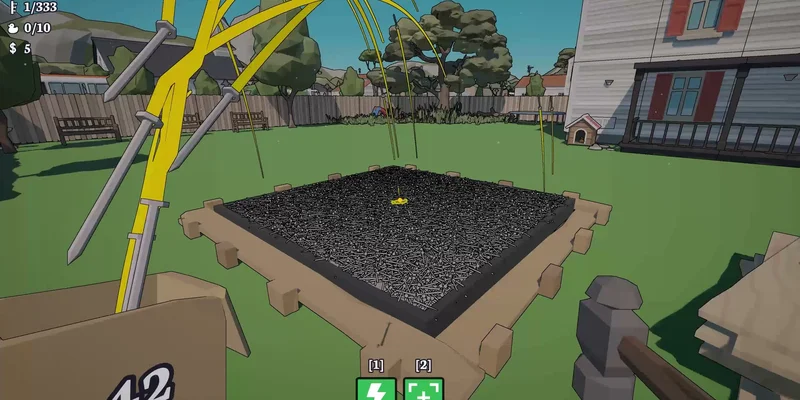
- Hammer these nails centers on collecting nails, loading objects, and hammering construction targets.
- Start with selection radius to gather nearby nails faster and reduce unnecessary walking.
- Use small objects first because lights, vents, notes, chairs, and benches can provide quick progress.
- Unlock abilities gradually by combining nail deposits, lightning, reach, strength, and handling speed.
- Open new areas at milestones such as the 200-, 5,000-, and 10,000-nail gates.
Hammer these nails Complete Gameplay Core Loop
The central loop is simple: collect loose nails, place them into nearby construction slots, and swing the hammer until each target is complete. Progress comes from both finished objects and the upgrades purchased with earned money. The most efficient approach is not to attack the largest wall immediately. Instead, clear compact objects that keep nails close together and produce early cash for better handling.
Video Highlights:
- The opening section teaches the basic ten-hit hammer rhythm.
- Nail selection radius quickly improves collection speed and multi-target handling.
- Lightning can chain across nearby nails when several targets are prepared.
- Small lights, vents, notes, benches, and furniture become useful early targets.
- Reaching 5,000 nails opens a major progression gate and leads toward the roof.
Do not spend your first income randomly. Build a small nail reserve, purchase collection convenience, then clear compact targets before committing to large walls or fences.
The first minutes establish several important rules:
- A nail may need multiple hammer hits before it sits flush.
- Nearby nails can be selected together once the pickup and selection radius improve.
- Some construction pieces only pay after the entire object or section is completed.
- Abilities can either generate, move, or accelerate nails.
- Nail placement and hammering are separate actions, so preparation matters.
| Gameplay Element | What It Does | Early Value |
|---|---|---|
| Nail pickup | Adds loose nails to your carried supply | Essential for every target |
| Nail placement | Loads nails into nearby construction slots | Prepares objects for hammering |
| Hammer hits | Drives loaded nails into the structure | Main completion action |
| Selection radius | Reaches more nearby nails | Excellent early upgrade |
| Lightning | Chains hits across nearby nails | Strong against dense clusters |
| Reach | Expands the hammering area | Better for walls and fences |
The most important habit is to separate loading from hammering. Walk through a target area and fill as many visible slots as possible. Then activate an ability or swing through the cluster. This prevents repeated trips between the nail supply and the construction piece.
Step-by-Step Progression Route
A reliable route moves from short-range collection to grouped targets, then to larger structures and gated areas. The sequence below follows the progression pattern shown during complete gameplay while keeping the advice flexible for different layouts.
Build a Nail Reserve
Collect loose nails until you have enough to work without returning after every few hits. Use nearby objects as temporary storage points and avoid crossing the whole yard for small batches.
Clear Compact Targets
Prioritize vents, lights, sticky notes, benches, chairs, plants, and other small objects with concentrated nail slots. These targets are easier to finish and help fund the first upgrades.
Buy Collection and Handling Upgrades
Improve selection radius, extra nail pickup, dispenser behavior, and nail handling speed. These upgrades reduce the time between collecting, loading, and striking.
Prepare Dense Clusters
Load walls, fences, porch pieces, steps, and door frames before using lightning or wide hammer reach. Abilities become more valuable when many nails are already nearby.
Use Milestones to Open New Areas
Check gated doors after reaching their nail requirements. The 200-nail and 5,000-nail milestones provide meaningful access, while the 10,000-nail objective leads to the final visible progression sequence.
A huge wall can consume your entire nail supply while giving little immediate feedback. Clear nearby small objects first, then return with stronger reach, better handling, and a prepared ability cycle.
| Route Phase | Recommended Targets | Main Goal |
|---|---|---|
| Opening yard | Vents, lights, small notes | Earn initial cash |
| First upgrade cycle | Benches, chairs, plants, doghouse | Improve collection rhythm |
| Midgame | Door frames, steps, porch pieces | Test grouped abilities |
| Large construction | Walls, fences, roof sections | Use reach and lightning |
| Final push | Remaining roof pieces and gated areas | Complete milestone progress |
When a target appears to stop paying, inspect the entire object rather than assuming the reward is missing. Doors, wall segments, and fences may contain nail slots on their backs, sides, upper edges, or partially hidden areas. A single unfilled slot can prevent completion.
Upgrade Priority and Ability Choices
The upgrade bench rewards a focused build. Early purchases should improve how quickly you gather and place nails. Damage-style upgrades become more valuable after you can consistently create dense groups for lightning or wide hammer hits.
Selection Radius
Top early priority. Collects nails from a wider area and makes clustered objects easier to prepare.
Handling Speed
Strong midgame choice. Reduces the delay between picking up, placing, and sending nails toward targets.
Lightning
Best for clusters. Chains hits across nearby nails after preparation, especially on walls and fences.
Reach and Strength
Late push tools. Improve coverage and make large construction sections more manageable.
Prioritize selection radius first, then handling speed and extra pickup capacity. Add dispenser or auto-placement convenience before investing heavily in strength unless a large target is blocking progress.
The gameplay sequence demonstrates that convenience upgrades can outperform flashy abilities early. A larger pickup radius means fewer steps. Faster handling means more nails can be prepared during one trip. A dispenser or automatic placement effect helps keep adjacent slots supplied while you focus on hammering.
| Upgrade Type | Best Use | Suggested Timing | Rating |
|---|---|---|---|
| Selection radius | Gathering nearby nails | First purchases | Excellent |
| Extra pickup | Carrying larger batches | Early to midgame | Very good |
| Handling speed | Faster nail movement | Midgame | Excellent |
| Dispenser | Feeding adjacent slots | Midgame | Very good |
| Lightning | Hitting prepared clusters | After setup improves | Excellent |
| Strength | Improving hit power | Mid to late game | Good |
| Reach | Covering wider sections | Large walls and roofs | Excellent |
| Vacuum or capacity | Holding more nails | When supply trips slow down | Good |
A useful ability cycle looks like this:
- Gather a large group of nails.
- Walk along the target and load visible slots.
- Activate the dispenser or placement ability.
- Use lightning while the nails remain tightly grouped.
- Increase reach when the remaining slots spread across a wall, fence, or roof.
This approach turns abilities into multipliers rather than emergency buttons. Lightning is less impressive when only a few nails are present, but it can clear a dense section rapidly when the target has already been loaded.
Farming Route, Gates, and Hidden Objectives
The fastest income route favors objects that are small, close together, and easy to verify. Lights and vents are especially useful because they require fewer visible slots than major construction pieces. Sticky notes, signs, benches, chairs, and small decorative objects can also provide quick completions while revealing more of the yard.
Use a full loop around the property after each upgrade purchase. Revisit walls, roof edges, furniture, signs, and hidden corners because improved reach or vision can expose targets that were previously easy to miss.
| Target Category | Search Area | Why It Matters |
|---|---|---|
| Lights | House exterior and side structures | Often compact and easy to finish |
| Vents | Walls, sheds, and smaller structures | Good early completion targets |
| Sticky notes | Walls and work areas | Easy to overlook, but quick to clear |
| Benches and chairs | Yard and porch | Clustered slots support ability use |
| Doghouse and plants | Side yard and garden areas | Useful after basic upgrades |
| Fences | Property perimeter | High nail count, better with reach |
| Roof sections | Upper house and elevated areas | Requires jump or access upgrades |
Several gates shape the route:
- A low gate around 200 nails can open an early enclosed area.
- A larger 5,000-nail gate provides access to an upper section and new movement options.
- The 10,000-nail objective marks the major completion milestone shown in the gameplay sequence.
- Ten hidden ducks can be collected as a separate exploration objective.
- Jumping, running, and trampoline movement make later navigation more practical.
Use the duck hunt as a secondary objective rather than interrupting every construction cycle. The hidden collectibles are easier to locate after movement access improves. Search inside newly opened rooms, around the pool, near the roof, and along unusual side paths.
Progression Checklist:
- Collect enough nails for a stable opening reserve
- Purchase selection radius and handling improvements
- Clear compact lights, vents, notes, benches, and furniture
- Use lightning on prepared wall, fence, and roof clusters
- Reach the major 5,000- and 10,000-nail milestones
- Search for all ten hidden ducks after movement upgrades
The final construction push is mostly an inspection task. If the completion percentage or reward does not appear, walk around the object slowly and check the lowest rows, upper roofline, rear wall, and areas concealed by bushes or other geometry.
Completion Tips and FAQ
Late-game progress becomes more controlled once the hammer range, selection radius, and nail handling speed are high. At that point, the main challenge is not gathering enough nails but identifying the few slots left behind by wide-area abilities.
When a structure looks finished, lower your movement speed and trace each row from left to right. Controlled passes reveal missed slots more reliably than rapidly crossing the entire property.
| Problem | Likely Cause | Fix |
|---|---|---|
| Object will not complete | One slot is hidden or behind the structure | Check rear, lower, and upper edges |
| Nails fly to the wrong area | Placement ability targets nearby valid slots | Stand closer to the intended object |
| Lightning feels weak | Too few nails are grouped | Load the target before activating it |
| Progress seems slow | Large target chosen too early | Clear compact objects and upgrade first |
| Roof remains unfinished | Upper access is locked | Reach the milestone and unlock movement |
| Cash reward is delayed | Entire section is not complete | Inspect every connected piece |
Q: What should I upgrade first in Hammer these nails complete gameplay?
Selection radius is the strongest early choice because it improves nail gathering immediately. Follow it with extra pickup, handling speed, and a dispenser or placement convenience upgrade.
Q: Which objects are best for early money?
Start with compact targets such as lights, vents, sticky notes, benches, chairs, and small decorative pieces. They require less travel and are easier to verify than walls or fences.
Q: When should I use the lightning ability?
Use lightning after loading a dense group of nails around a wall, fence, porch, roof section, or other clustered target. It is most efficient when several nails are within chain range.
Q: How do I reach the roof?
Continue progressing through the nail gates and inspect newly opened areas for movement options. The later sequence introduces jumping and elevated access, allowing roof sections and upper collectibles to be reached.
The complete gameplay route is built around preparation. Gather a reserve, finish compact targets, buy upgrades that shorten every action, and only then commit to the largest structures. With that rhythm, the yard becomes easier to read, abilities become more valuable, and the final roof and fence cleanup requires less backtracking.